Discover the secret to perfectly crisp, oil-free bread and toast using a specialized toaster rack insert. This guide will walk you through everything you need to know to achieve a delightful crunch without the added oil or mess. Learn how to use and maintain your insert for consistently delicious results.
# Toaster Rack Insert for Oil Free Crisp Bread and Toast
Are you tired of soggy bread or toast that’s unevenly browned? Do you dream of achieving that perfect, satisfying crunch on your favorite baked goods without adding a single drop of oil? If so, you’re in for a treat! The humble toaster rack insert might just be your new best friend in the kitchen.
Many people think toasters are just for bread slices. But with the right accessories, your toaster can become a versatile tool for creating deliciously crisp snacks and breakfast items. This guide is designed to show you exactly how to use a toaster rack insert to make oil-free crisp bread and toast. We’ll cover everything from selecting the right insert to cleaning and troubleshooting. Get ready to elevate your toasting game!
## What is a Toaster Rack Insert?
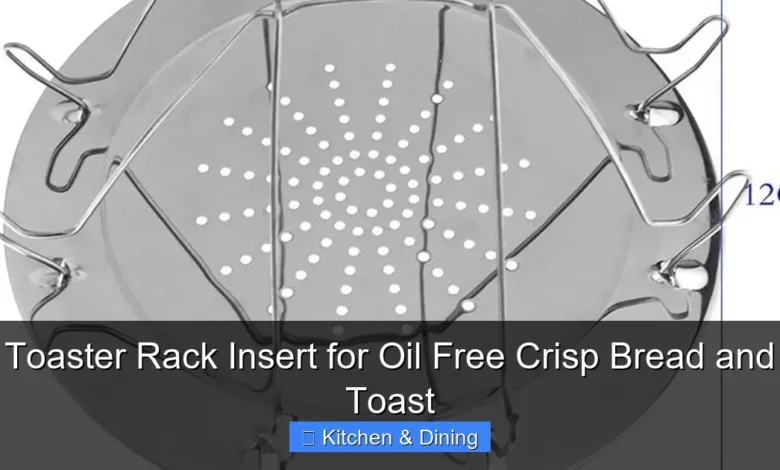
A toaster rack insert is a kitchen gadget designed to fit inside your standard toaster slots. It typically features a wire rack or perforated surface that holds food items. Unlike regular bread slots, these inserts are designed to accommodate wider or irregularly shaped items, and more importantly, to allow for better air circulation around your food. This improved airflow is key to achieving that desirable crispiness without the need for oil.
These inserts are made from heat-resistant materials like stainless steel or food-grade silicone, ensuring durability and safety during the toasting process. They come in various designs, but their core function remains the same: to provide a stable platform for your food to toast evenly and develop a satisfying crunch.
## Why Use a Toaster Rack Insert for Oil-Free Crispness?
The primary benefit is achieving crispiness without oil. Many people are looking for healthier alternatives to fried or pan-toasted foods. With a toaster rack insert, you can achieve a delightful crunch simply by using the heat and airflow of your toaster.
Here are some other great reasons:
* Healthier Options: Reduce fat and calorie intake by avoiding butter, oil, or other fats.
* Versatility: Perfect for more than just bread! Think bagels, pita bread, flatbreads, pastries, and even small baked items.
* Even Browning: The design allows hot air to circulate around the entire piece of food, leading to more consistent toasting.
* Reduced Mess: Keeps crumbs contained and prevents food from falling into the toaster mechanism.
* Convenience: Quick and easy to use, just like toasting regular bread.
## Getting Started: Choosing Your Toaster Rack Insert
Before you can start toasting, you need the right tool! While many inserts look similar, a few factors can help you choose the best one for your needs.
### Types of Toaster Rack Inserts
* Wire Racks: These are the most common. Made of stainless steel, they are durable and offer excellent airflow. They are usually designed to hold one or two items.
* Silicone Mats with Racks: Some inserts combine a silicone base (for easy cleaning) with a wire rack. This can help catch drips and crumbs.
* Expandable Racks: Some models are adjustable to fit different toaster sizes or to hold multiple items.
### Key Features to Look For
* Material: Opt for food-grade stainless steel or high-quality, heat-resistant silicone. These materials are safe, durable, and easy to clean.
* Size and Compatibility: Ensure the insert is designed to fit your specific toaster model. Measure your toaster slots if you’re unsure. Some are universal, while others are brand-specific.
* Ease of Cleaning: Look for inserts that are dishwasher safe or have a non-stick surface for effortless cleaning.
* Stability: The rack should feel sturdy and not wobble when placed in the toaster.
## How to Use Your Toaster Rack Insert: Step-by-Step
Using a toaster rack insert is surprisingly simple. Here’s a breakdown of the process:
### Step 1: Prepare Your Food
This is where the fun begins! You can toast a variety of items.
#### Common Food Items for Toasting
* Bread Slices: Any type of bread works – white, whole wheat, sourdough, rye. If you’re using a thick slice, the rack is especially helpful.
* Bagels: Cut your bagel in half. The rack holds them securely.
* Pita Bread and Flatbreads: These are perfect candidates for crisping up. You can toast them whole or in halves.
* English Muffins: Cut them in half for toasting.
* Waffles and Pancakes: Leftover waffles or pancakes can be crisped up beautifully.
* Small Pastries: Think of croissants or danishes that might benefit from a little extra crisp.
* Pre-cooked Items: Some small, pre-cooked items like mini quiches or empanadas could be reheated and crisped, but be cautious of ingredients that might melt or drip excessively.
#### Preparing Specific Items
* For Bread: Place slices directly onto the rack.
* For Bagels and English Muffins: Cut them in half. Place the cut side down first if you prefer a crisper surface, or experiment with toasting both sides.
* For Pita and Flatbreads: Lay them flat on the rack. You might need to fold thinner breads slightly to fit if your toaster slots are narrow, but most inserts allow for full placement.
* For Pastries: Place them carefully on the rack to prevent them from falling through.
### Step 2: Place the Insert into the Toaster
This step is straightforward but important for safety and proper function.
#### Inserting the Rack
* Open the Toaster Slots: If your toaster has a lever, push it down to open the slots and the mechanism.
* Position the Insert: Carefully place the toaster rack insert into the toaster slots. Ensure it sits securely and is stable. Some inserts have specific guides or tabs to help them fit correctly.
* Load Your Food: Place your prepared food items onto the rack within the toaster slots. Make sure the food isn’t touching the heating elements directly.
### Step 3: Select Toasting Settings
This is where you control the crispiness.
#### Adjusting the Dial
* Start Low: If you’re unsure about your toaster’s heat or the food’s toasting time, start with a lower setting. You can always toast for longer.
* Consider Food Type: Denser items like bagels might require a slightly longer or higher setting than thin flatbreads.
* Monitor: Keep an eye on your food as it toasts, especially during the first few times you use the insert. Toasters vary greatly in power and heat distribution.
### Step 4: Start the Toasting Cycle
Once everything is in place and set, it’s time to toast.
#### Initiating the Toast
* Lower the Lever: Push the toaster lever down to begin the toasting cycle. The toaster will start heating up.
* Listen and Watch: Pay attention to the sounds and smells. If you notice smoke or a burning odor, stop the toaster immediately.
### Step 5: Remove Your Crisp Toast
Safety first when removing hot food!
#### Careful Extraction
* Wait for the Cycle to Finish: Most toasters will pop up automatically when done.
* Use Tongs (Recommended): Once the toaster has finished and popped up, use a pair of kitchen tongs to carefully lift the rack and your perfectly toasted food out of the toaster. Avoid using metal utensils that could damage the toaster or the rack.
* Allow to Cool Slightly: Let the food cool for a moment before handling or eating.
## Practical Tips for Perfect Results
* Don’t Overcrowd: Ensure there’s enough space between items on the rack for even heat circulation.
* Pre-toasted Bread: If you have slightly stale bread, it will often toast up even crispier.
* Experiment with Settings: Every toaster is different. Keep a mental note (or a written one!) of the best settings for different types of food.
* For Extra Crispiness: You can toast one side, flip the item on the rack, and toast the other side.
* Cleaning is Key: Clean your insert after each use to prevent residue buildup, which can affect taste and performance.
## Cleaning and Maintenance
Keeping your toaster rack insert clean is vital for hygiene and longevity.
### How to Clean Your Insert
* Read Manufacturer Instructions: Always check the care instructions that come with your specific insert.
* Dishwasher Safe: Many stainless steel and silicone inserts are dishwasher safe. Place them on the top rack for best results.
* Hand Washing: If not dishwasher safe, wash with warm, soapy water. Use a non-abrasive sponge or brush to remove any stuck-on crumbs or residue. For stubborn bits, soaking in hot water can help.
* Drying: Ensure the insert is completely dry before storing it to prevent rust or mold.
### Troubleshooting Common Issues
* Food Sticking: If food is sticking, your insert might need a more thorough cleaning, or you might be toasting at too high a heat. For stubborn food, try soaking the rack. If it’s a consistent problem, consider an insert with a non-stick coating.
* Uneven Toasting: This can happen if the food is not placed evenly on the rack or if the toaster has uneven heating. Try repositioning the food or rotating the rack halfway through the toasting cycle.
* Food Falling Through: Ensure you are using the insert correctly and that your food items are appropriately sized for the rack openings. Some inserts have finer mesh for smaller items.
* Burning Smell: This usually means food debris has accumulated in your toaster or on the rack. Stop toasting immediately, unplug the toaster, and clean both the toaster and the insert thoroughly. It’s also a sign you might need to reduce the toasting time or heat setting.
## Beyond Breakfast: Creative Uses for Your Toaster Rack Insert
While perfect for breakfast staples, this insert can unlock other kitchen possibilities.
* Crispy Snacks: Toasting pieces of pita bread or leftover pizza crusts can create quick, crispy snacks.
* Reheating Pastries: Give day-old croissants or danishes a second life with a quick crisp in the toaster.
* DIY Croutons: Cube some bread, toss lightly with herbs (no oil needed for this method!), and toast in the insert for homemade croutons. For a truly oil-free experience, skip the herbs or use dried ones that won’t burn.
* Toasted Sandwiches (Limited): While not designed for full grilled cheese, you can toast the *outside* of small, thin sandwiches made with ingredients that won’t ooze out. Monitor closely!
## Conclusion
The toaster rack insert is a simple yet incredibly effective tool for anyone looking to enjoy perfectly crisp bread and other baked goods without the added oil. It’s versatile, easy to use, and even easier to clean, making it a fantastic addition to any kitchen.
By following the steps and tips in this guide, you’ll be well on your way to enjoying consistently delicious, oil-free crisp toast every time. So, dust off that toaster, grab your favorite bread, and get ready to experience a new level of toasting perfection!
Key Takeaways
- Achieve Oil-Free Crispness: A toaster rack insert allows you to toast bread, bagels, and other baked goods to a perfect crisp without needing any added oil.
- Versatile Toasting: This insert is ideal for various items like flatbreads, pita bread, and even pre-cooked items that benefit from a crispy texture.
- Easy to Use: The process involves simply placing your food item on the rack and inserting it into your toaster, similar to toasting bread slices.
- Simple Cleaning: Most toaster rack inserts are designed for easy cleaning, often being dishwasher safe or requiring a quick wipe-down.
- Prevents Sticking: The design of the rack helps prevent food from sticking to your toaster’s heating elements, reducing mess and potential damage.
- Consistent Results: By elevating the food and allowing for even heat circulation, the insert ensures uniform browning and crispiness.