
Unlock perfectly cooked rice with ease using your Black and Decker rice cooker. This comprehensive guide walks you through every step, from preparation to serving. Learn essential tips for different rice types and common troubleshooting solutions, ensuring delicious, fluffy rice for every meal.
You’ll be a rice-cooking pro in no time!
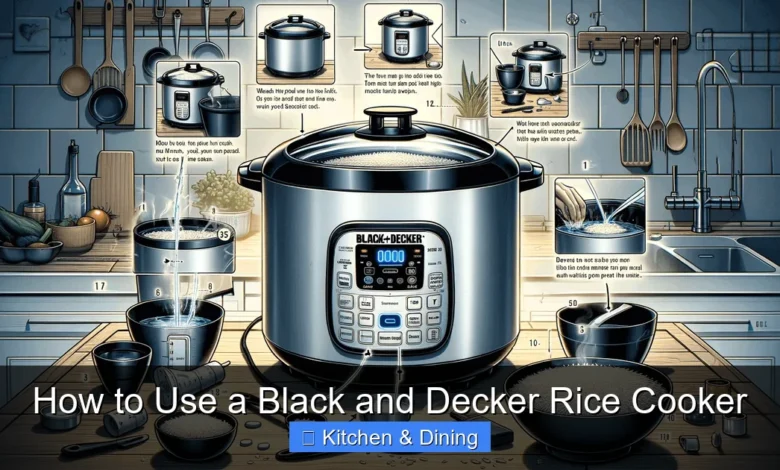
## How to Use a Black and Decker Rice Cooker
Are you tired of gummy, burnt, or unevenly cooked rice? A Black and Decker rice cooker can be your secret weapon for consistently perfect rice, whether it’s fluffy white rice, hearty brown rice, or even delicate basmati. These appliances are designed for simplicity, but knowing a few key steps can elevate your rice game to a whole new level.
This guide will walk you through everything you need to know to get the most out of your Black and Decker rice cooker. We’ll cover preparation, cooking, and even a few tips for keeping your cooker in top shape. By the end, you’ll be confident in your ability to whip up delicious, restaurant-quality rice every single time.
### Getting to Know Your Black and Decker Rice Cooker
Before you even think about adding rice, take a moment to understand your specific Black and Decker rice cooker model. While features can vary slightly, most models share common components and functions.
#### Inner Pot
This is where all the magic happens! The inner pot is usually made of non-stick material, making cleanup easier. It’s crucial to use the pot that came with your rice cooker, as it’s designed to work with the heating element.
#### Measuring Cup
Your rice cooker likely came with a specific measuring cup. It’s important to use this cup for both rice and water, as it’s calibrated for the cooker’s performance. Standard kitchen measuring cups might have slightly different volumes.
#### Lid
The lid seals in the steam and heat, ensuring even cooking. Many lids have a steam vent to release excess pressure, preventing overflow.
#### Control Panel
This is where you’ll find the buttons or switches to operate your rice cooker. Common settings include:
* Cook: This initiates the cooking cycle.
* Warm: This setting keeps your rice warm after it’s finished cooking, without overcooking it.
* White Rice: A standard setting for most types of white rice.
* Brown Rice: This setting typically uses a longer cooking time and slightly different temperature for brown rice.
* Steam: Some models have a separate steam function for vegetables or other items.
* Delay Start: This allows you to set the rice cooker to begin cooking at a later time.
#### Power Cord
This connects your rice cooker to a power outlet. Always ensure the cord is in good condition and properly plugged in.
### Step-by-Step Guide to Cooking Rice
Now that you’re familiar with your appliance, let’s get to the fun part – cooking delicious rice!
#### Step 1: Measure Your Rice
The first step is to measure the amount of rice you want to cook. Use the measuring cup provided with your Black and Decker rice cooker. For example, if you want to cook 2 cups of rice, use the rice cooker’s measuring cup to scoop out 2 cups of dry rice.
* Tip: A standard Black and Decker rice cooker cup is usually 180ml, which is slightly less than a standard US cup (237ml). Using the correct cup is essential for accurate water ratios.
#### Step 2: Rinse the Rice
This is a crucial step that many people skip, but it makes a big difference! Rinsing removes excess starch from the rice grains. This prevents the rice from becoming too sticky or clumpy after cooking.
* How to Rinse: Place the measured rice in a fine-mesh sieve or directly into the inner pot. Run cold water over the rice, swirling it gently with your hand. The water will become cloudy with starch. Continue rinsing until the water runs mostly clear. Drain the rice thoroughly.
* Why it Matters: For certain dishes, like sticky rice or sushi rice, you might want to retain some starch. However, for most everyday rice dishes, rinsing is highly recommended. If you’re looking for inspiration on different rice dishes, exploring recipes might lead you to discover the best Korean rice cookers for authentic flavors.
#### Step 3: Add Water
This is where the rice-to-water ratio comes into play. The ratio depends on the type of rice you’re cooking and your personal preference for texture.
* General Guidelines (using the provided measuring cup):
* White Rice: Typically a 1:1.5 or 1:2 ratio (rice to water). For example, 1 cup of rice to 1.5 cups of water, or 1 cup of rice to 2 cups of water. Start with 1:1.5 and adjust in future batches if you prefer it softer or firmer.
* Brown Rice: Usually requires more water and a longer cooking time. A common ratio is 1:2 or 1:2.5 (rice to water).
* Other Grains: Check your rice packaging or the rice cooker manual for specific water ratios for grains like basmati, jasmine, or wild rice.
* How to Add Water: Pour the measured cold water into the inner pot with the rinsed rice. You can also use broth or stock instead of water for added flavor.
* Water Level Markings: Some inner pots have markings inside that correspond to the number of cups of rice. These can be helpful, but it’s often more accurate to use the water-to-rice ratio.
#### Step 4: Place the Inner Pot and Close the Lid
Carefully place the inner pot into the rice cooker body. Make sure it’s sitting level. Close the lid securely. You should hear a click if it’s properly latched.
#### Step 5: Select the Cooking Setting
Turn on your Black and Decker rice cooker. Select the appropriate cooking setting for the type of rice you’re using (e.g., “White Rice,” “Brown Rice”). If your model doesn’t have specific settings for different rice types, you’ll typically just press the “Cook” button.
#### Step 6: Start the Cooking Cycle
Press the “Cook” button or the designated start button. The indicator light should illuminate, signaling that the cooking cycle has begun.
#### Step 7: Let the Cooker Do Its Job
Resist the urge to open the lid while the rice is cooking. This releases steam and heat, which can disrupt the cooking process and result in unevenly cooked rice. Your Black and Decker rice cooker is designed to automatically switch to “Warm” mode when the cooking cycle is complete.
#### Step 8: Rest the Rice
Once the cooker switches to “Warm” mode, it’s best to let the rice rest for about 10-15 minutes. This allows the residual steam to finish cooking the grains and distribute moisture evenly. The rice will be fluffier and have a better texture.
* Example: If you’re making rice for dinner, start it about 45 minutes to an hour before you plan to serve, accounting for cooking and resting time.
#### Step 9: Fluff and Serve
After resting, open the lid. Use a rice paddle or a fork to gently fluff the rice. This separates the grains and makes them light and fluffy. Serve your perfectly cooked rice immediately.
### Using the “Warm” Function
The “Warm” function is a fantastic feature that keeps your rice at an ideal serving temperature without continuing to cook it. This is perfect for when you’re cooking a meal with multiple components and want to keep the rice ready until everything else is done.
* How it Works: When the cooking cycle finishes, the rice cooker automatically transitions to “Warm” mode. An indicator light will usually show that it’s in this mode.
* Duration: Most rice cookers can keep rice warm for several hours. However, prolonged warming can sometimes dry out the rice or affect its texture. For the best taste, try to serve within 1-2 hours of the cooking cycle completing.
### Advanced Features and Tips
Many Black and Decker rice cooker models come with additional features that can enhance your cooking experience.
#### Delay Start Function
This feature is a lifesaver for busy schedules. You can add your rice, water, and ingredients to the inner pot, set the desired cooking time, and program the rice cooker to start at a later hour. Imagine waking up to perfectly cooked oatmeal or coming home to ready-to-eat rice for dinner!
* How to Use:
1. Prepare your rice and water as usual.
2. Add any other ingredients if making a one-pot meal.
3. Close the lid and select your desired cooking setting.
4. Press the “Delay Start” button.
5. Use the +/- buttons or dial to set the desired time (e.g., in hours and minutes) until you want the cooking to *finish*.
6. Press “Start” or confirm the setting. The cooker will count down to the start of the cooking cycle.
#### Steam Function
If your model has a steam function, it’s great for more than just rice. You can use it to steam vegetables, fish, or dumplings.
* How to Use:
1. Add the required amount of water to the inner pot (check your manual for the specific amount for steaming).
2. Place the steamer basket (if included) into the inner pot.
3. Arrange your food in the steamer basket.
4. Close the lid and select the “Steam” function.
5. Set the cooking time if required by your model.
6. Press “Start.”
#### Cooking Other Grains and Foods
Black and Decker rice cookers are versatile. You can often cook:
* Quinoa: Follow a similar process to white rice, usually with a 1:1.5 or 1:2 ratio.
* Oatmeal: Use rolled oats and water or milk. A 1:2 ratio is often a good starting point. Use the “Cook” setting, but keep a close eye on it as oatmeal can foam up.
* Soups and Stews: For simpler, broth-based soups, you can add ingredients and use the “Cook” setting. Be mindful of overfilling and avoid ingredients that expand significantly. For heartier stews, a slow cooker might be a better choice, but for quick, lighter options, your rice cooker can do the job. It’s a good idea to familiarize yourself with options like the best multi-function slow cooker if you plan on making more elaborate stews regularly.
### Cleaning and Maintenance
Keeping your Black and Decker rice cooker clean is essential for its longevity and for ensuring the best-tasting rice.
#### Cleaning the Inner Pot
* **After Each Use:** Once the rice cooker has cooled down, remove the inner pot. Most non-stick inner pots can be washed with warm, soapy water and a soft sponge or cloth.
* Dishwasher Safe: Many inner pots are also dishwasher safe. Always check your user manual to confirm.
* Stubborn Residue: If there’s stuck-on rice, fill the pot with warm water and let it soak for 30 minutes to an hour. Then, wash as usual. Avoid using abrasive scrubbers or steel wool, as they can damage the non-stick coating.
#### Cleaning the Lid and Accessories
* Lid: The lid can usually be wiped clean with a damp cloth. If the steam vent is removable, detach it and wash it with warm, soapy water. Ensure it’s completely dry before reattaching.
* Measuring Cup and Rice Paddle: Wash these with warm, soapy water.
#### Cleaning the Exterior
* Wipe the exterior of the rice cooker with a damp cloth. Never immerse the base unit in water, as this can damage the electrical components.
#### Storage
* Ensure all parts are completely dry before storing.
* Store the rice cooker in a cool, dry place. You can keep the accessories inside the cooker to save space.
### Troubleshooting Common Issues
Even with the best appliances, you might encounter minor problems. Here are some common issues and how to resolve them:
#### Rice is too Wet or Mushy
* Cause: Too much water was used, or the rice wasn’t rinsed properly.
* Solution: The next time, reduce the amount of water slightly or ensure thorough rinsing. If the rice is already cooked and too wet, you can try leaving the lid off on the “Warm” setting for a short period to allow some moisture to evaporate, but be careful not to dry it out completely.
#### Rice is too Dry or Undercooked
* Cause: Not enough water was used, or the cooking cycle was interrupted.
* Solution: Add a tablespoon or two of hot water to the rice, stir gently, close the lid, and let it sit on the “Warm” setting for 10-15 minutes. For the next batch, increase the water amount slightly.
#### Overflowing
* Cause: Too much rice and water were added, or the steam vent is blocked.
* Solution: Ensure you are not exceeding the maximum fill line indicated in your manual or on the inner pot. Make sure the steam vent is clean and clear. If it’s a recurring issue, consider using slightly less rice and water.
#### Rice Sticks to the Bottom
* Cause: The non-stick coating may be damaged, or the rice was left in the cooker for too long on the “Warm” setting without sufficient moisture.
* Solution: Ensure you are using the correct rice-to-water ratio and not overcooking. If the non-stick coating is compromised, it might be time to consider replacing the inner pot or the entire unit.
#### Cooker Won’t Turn On
* Cause: The unit is not plugged in, or there’s a power issue.
* Solution: Check that the power cord is securely plugged into both the cooker and a working electrical outlet. Try plugging in another small appliance to the outlet to ensure it’s functional. If the problem persists, consult your user manual or contact customer support.
### Conclusion
Using a Black and Decker rice cooker is a straightforward process that yields delicious results. By following these simple steps—from accurate measuring and rinsing to understanding the cooking cycles and allowing for resting time—you can consistently achieve perfectly fluffy rice. Remember to consult your specific model’s manual for any unique features or instructions.
With a little practice, your Black and Decker rice cooker will become an indispensable tool in your kitchen, making meal preparation easier and tastier. Enjoy the convenience and the delightful taste of perfectly cooked rice every time!
Key Takeaways
- Understand Your Rice Cooker: Familiarize yourself with the specific model’s components and settings before you begin.
- Measure Accurately: Use the provided measuring cup and follow the rice-to-water ratio recommendations for optimal results.
- Rinse Your Rice: Rinsing helps remove excess starch, preventing sticky or gummy rice.
- Proper Cooking Cycle: Select the correct setting for your rice type and allow the cooker to complete its cycle without interruption.
- Let It Rest: After cooking, letting the rice steam for a few minutes improves texture and flavor.
- Easy Cleaning: Most inner pots are non-stick and dishwasher-safe, making cleanup a breeze.
- Troubleshoot Common Issues: Learn how to address minor problems like undercooked or overcooked rice.


