
Discover how to effortlessly make refreshing iced coffee using your everyday drip coffee maker. This guide provides simple, step-by-step instructions to brew a concentrated coffee base that chills perfectly, offering a cost-effective and convenient alternative to store-bought versions. Enjoy café-quality iced coffee from the comfort of your own kitchen!
Are you craving a cool, refreshing glass of iced coffee but don’t want to make a trip to the coffee shop or invest in fancy brewing equipment? Good news! You can easily make delicious iced coffee right at home using your trusty drip coffee maker. Yes, that’s the same machine you use for your morning brew can be your secret weapon for homemade iced coffee.
Making iced coffee at home with a drip coffee maker is surprisingly simple and incredibly cost-effective. Instead of paying premium prices for café versions, you can whip up your own customized blend whenever the mood strikes. This guide will walk you through everything you need to know, from brewing the perfect coffee concentrate to serving it up just the way you like it.
What will you learn from this guide?
- The simple method for brewing a strong coffee base in your drip coffee maker.
- Tips for chilling your coffee quickly to maintain its delicious flavor.
- How to customize your iced coffee with your favorite additions.
- Troubleshooting common problems for the perfect cup every time.
Let’s get started on your journey to perfect homemade iced coffee!
- Brew a concentrated coffee base: To avoid watered-down iced coffee, you’ll brew your coffee at double strength.
- Chill the coffee quickly: Promptly chilling the hot coffee is crucial to prevent it from becoming bitter.
- Use the right grind: A medium grind is generally best for drip coffee makers, but adjusting based on your specific machine is helpful. You can find some great options in our guide to the best coffee grinders for drip coffee.
- Experiment with additions: Customize your iced coffee with sweeteners, milks, creams, and flavorings to suit your taste.
- Storage is key: Store your concentrated coffee in an airtight container in the refrigerator for up to a week.
- Troubleshoot common issues: Learn how to fix watery or bitter iced coffee with simple adjustments.
Brewing Your Concentrated Coffee Base
The key to great iced coffee made in a drip coffee maker is brewing a coffee concentrate. If you brew coffee at your usual strength and then pour it over ice, you’ll end up with a weak, watery beverage. To prevent this, you need to make your coffee stronger than you normally would.
Step 1: Measure Your Coffee Grounds
This is where you’ll deviate from your usual coffee-making routine. For iced coffee, you’ll want to use about **double the amount of coffee grounds** you normally would for the amount of water you’re using.
* For a standard 12-cup coffee maker: If you normally use 6 tablespoons of coffee grounds for 12 cups of water, for iced coffee, you’ll use 12 tablespoons.
* Adjust based on your preference: This is a starting point. If you like your coffee extra strong, you can even go slightly above double. If you prefer it a bit milder, start with 1.5 times the amount.
It’s also important to use freshly ground coffee beans. For drip coffee makers, a medium grind is usually best. If you’re unsure about your grind size, check out our guide to the best coffee grinders for drip coffee. Freshly ground beans will always yield the best flavor.
Step 2: Measure Your Water
For this method, you’ll also adjust your water measurement. If you are using double the coffee grounds, you should use **half the amount of water** you would normally use for that amount of coffee.
* Example: If you typically make 10 cups of coffee using 10 cups of water and 10 tablespoons of grounds, for iced coffee, you would use 5 cups of water and 20 tablespoons of grounds.
* Think about the final volume: Remember that the ice will melt and add water to your drink. So, brewing a smaller, more concentrated batch is essential.
Step 3: Prepare Your Coffee Maker
Ensure your coffee maker is clean and ready to go. Any leftover coffee residue can affect the taste of your fresh brew. If it’s been a while since you last cleaned it, consider following a guide on the best way to clean the inside of a microwave oven, as similar principles apply to coffee maker maintenance.
* Clean the carafe: Wash the coffee pot and basket thoroughly.
* Add a filter: Place a fresh coffee filter in the brew basket.
Step 4: Brew the Coffee
Add your measured coffee grounds to the filter and pour in your measured water. Then, simply brew your coffee as you normally would. The machine will do all the work, transforming your grounds and water into a rich, potent coffee concentrate.
Chilling Your Coffee Concentrate
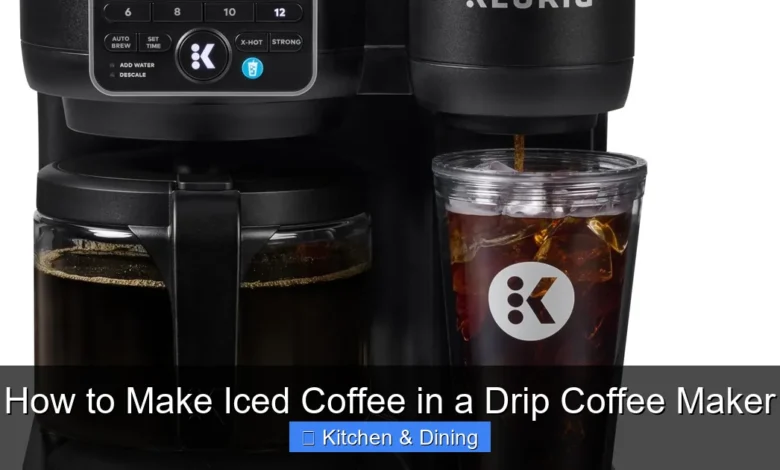
Visual guide about How to Make Iced Coffee in a Drip Coffee Maker
Image source: images-na.ssl-images-amazon.com
This is a critical step for delicious iced coffee. You don’t want to pour hot coffee directly over ice because it will melt the ice too quickly, diluting your drink and potentially making it bitter.
Step 1: Cool the Coffee Quickly
As soon as the brewing cycle is finished, it’s time to cool down your coffee. There are a few ways to do this:
* The Ice Bath Method:
* Prepare a larger container (like a bowl or pitcher) and fill it with ice and water.
* Place the carafe containing your hot coffee into this ice bath.
* Stir the coffee gently in the carafe occasionally to help it cool faster. This method is very effective at quickly bringing down the temperature.
* The Direct Ice Method (with caution):
* If you’re in a hurry, you can pour the hot coffee directly into a heat-safe pitcher filled with ice.
* Use a heat-safe pitcher for this. Stir the coffee and ice together vigorously. Be aware that this will melt the ice faster, so have plenty of ice ready.
Step 2: Transfer to a Reusable Container
Once the coffee has cooled significantly (it doesn’t need to be completely cold, just not piping hot), transfer it to a clean, airtight container. A glass jar or a sealed pitcher works well.
Serving Your Iced Coffee
Now for the fun part – assembling your perfect glass of iced coffee!
Step 1: Fill Your Glass with Ice
Start by filling your serving glass generously with ice cubes. The more ice you use, the colder your drink will stay.
Step 2: Pour in the Coffee Concentrate
Pour your chilled coffee concentrate over the ice. Fill the glass about halfway or two-thirds of the way, depending on how much coffee flavor you prefer.
Step 3: Add Your Liquid Base
This is where you dilute your concentrate and add creaminess. You can use:
* Cold Water: For a pure coffee flavor with minimal added calories.
* Milk: Dairy milk (whole, 2%, skim) is a classic choice.
* Non-Dairy Milk: Almond milk, oat milk, soy milk, or coconut milk are great alternatives.
* Cream or Half-and-Half: For a richer, more decadent iced coffee.
Fill the rest of your glass with your chosen liquid base, leaving a little room at the top for stirring.
Step 4: Sweeten and Flavor (Optional)
Now is the time to add any sweeteners or flavorings you desire.
* Sweeteners: Simple syrup (equal parts sugar and water heated until dissolved and then cooled), granulated sugar, honey, maple syrup, or artificial sweeteners. Simple syrup is often preferred because it dissolves easily in cold liquids.
* Flavorings: Vanilla extract, caramel syrup, chocolate syrup, cinnamon, or a dash of nutmeg.
Stir everything together well until the sweetener is dissolved.
Step 5: Add Cream or Toppings (Optional)
For an extra treat, you can add:
* A splash of cream or milk: For added richness.
* Whipped cream: A classic topping for iced coffee.
* A drizzle of caramel or chocolate sauce: For extra indulgence.
Give your iced coffee a final stir and enjoy your homemade creation!
Customization and Variations
The beauty of making iced coffee at home is that you can tailor it precisely to your taste. Don’t be afraid to experiment!
Sweeteners:
* Simple Syrup: As mentioned, this is a favorite because it mixes in smoothly. To make it, combine 1 cup of water and 1 cup of sugar in a saucepan. Heat gently, stirring until the sugar is completely dissolved. Let it cool completely before storing it in an airtight container in the refrigerator. It will last for a few weeks.
* Flavored Simple Syrups: You can infuse simple syrup with flavors like vanilla bean, cinnamon sticks, or even citrus peels while it’s heating.
* Agave Nectar or Maple Syrup: These offer different flavor profiles and can be good alternatives to sugar.
Milks and Creams:
* **Dairy:** Whole milk provides richness, while skim milk is a lighter option.
* Non-Dairy: Oat milk is becoming very popular for its creamy texture and slightly sweet flavor. Almond milk is lighter, and coconut milk can add a tropical note.
* **Heavy Cream or Half-and-Half:** For a luxurious, decadent iced coffee experience.
Flavorings:
* **Extracts:** A few drops of vanilla, almond, or peppermint extract can add a wonderful aroma and taste.
* Syrups: Purchased coffee syrups (vanilla, caramel, hazelnut, mocha) are easy to use.
* Spices: A pinch of cinnamon, nutmeg, or cardamom can add warmth and complexity.
* Cocoa Powder: Add a tablespoon of unsweetened cocoa powder to your coffee grounds before brewing for a chocolatey twist.
* Orange Zest: A small strip of orange zest added during brewing can impart a subtle citrus note.
Coffee Bean Choices:
The type of coffee beans you use will significantly impact the flavor of your iced coffee.
* **Medium Roasts:** Often provide a balanced flavor that works well for iced coffee.
* **Dark Roasts:** Can yield a bolder, more intense flavor, but be careful as they can sometimes taste more bitter when cold.
* Light Roasts: Can offer brighter, fruitier notes, which can be refreshing in iced coffee, but they might require a bit more experimentation with brewing strength.
If you’re looking for beans that are great for drip coffee, you might want to research the best coffee grinders for home to ensure you get the most out of your beans.
Troubleshooting Common Issues
Even with the best intentions, sometimes things don’t go perfectly. Here are a few common issues and how to fix them.
My Iced Coffee Tastes Watery
This is the most common problem and usually stems from not brewing the coffee strong enough.
* Solution: Next time, use more coffee grounds or less water when brewing your concentrate. Ensure you’re using roughly double the grounds and half the water.
My Iced Coffee Tastes Bitter
Bitterness can come from a few sources, including over-extraction or coffee that sat on the heat too long.
* Solution:
* Brewing time: Make sure your coffee maker isn’t brewing too slowly, which can over-extract the grounds.
* Cooling: Ensure you are cooling the coffee quickly after brewing. Letting hot coffee sit can develop bitterness.
* Bean choice: Very dark roasts can sometimes be more prone to bitterness when chilled. Try a medium roast next time.
* Too much concentrate: If you’re using too much concentrate relative to your liquid base, the bitterness can be amplified. Adjust the ratio.
My Iced Coffee Isn’t Cold Enough
This usually means there wasn’t enough ice or it melted too quickly.
* Solution:
* More Ice: Use a fuller glass of ice.
* Chill Concentrate Better: Make sure your coffee concentrate is well-chilled before pouring it over ice.
* Pre-chill Your Glass: For an extra cold drink, pop your serving glass in the freezer for 10-15 minutes before you start assembling your iced coffee.
My Coffee is Gritty
This happens if you’re using too fine a grind for your drip coffee maker, or if your filter isn’t seated properly.
* Solution:
* Adjust Grind Size: Ensure you are using a medium grind. Too fine a grind can pass through the filter.
* Check Filter: Make sure the coffee filter is properly placed in the basket and not folded or torn.
* Use a Quality Filter: Sometimes, cheaper filters can allow fine particles through.
Tips for Making the Best Iced Coffee
* Fresh is Best: Always use freshly roasted and ground coffee beans for the best flavor.
* Water Quality Matters: Use filtered water for brewing your coffee. It makes a surprising difference.
* Pre-chill Everything: If you have time, chilling your coffee concentrate in the refrigerator overnight, pre-chilling your serving glass, and using very cold milk or water will result in an exceptionally cold drink.
* Make Coffee Ice Cubes: Instead of regular ice cubes, freeze leftover coffee in an ice cube tray. This way, as your “ice” melts, it just adds more coffee flavor, not water!
* **Storage:** Store your brewed coffee concentrate in an airtight container in the refrigerator for up to 3-4 days for optimal freshness.
Conclusion
You’ve now learned how to transform your everyday drip coffee maker into an iced coffee powerhouse! By brewing a concentrated coffee base and chilling it properly, you can enjoy a delicious, refreshing, and customizable iced coffee any time you like. Forget those expensive trips to the coffee shop; your kitchen is now your personal barista station.
Experiment with different beans, sweeteners, and milks to discover your perfect iced coffee combination. With these simple steps, you’re well on your way to mastering the art of homemade iced coffee. Enjoy your cool, caffeinated creation!


