
Learn how to make a perfect, flaky pie crust quickly and easily using a food processor. This guide provides simple steps and helpful tips to achieve bakery-quality results at home. You’ll master the art of the food processor pie crust for all your favorite pies, from sweet fruit pies to savory quiches.
Making a delicious pie from scratch is incredibly rewarding, but often the pie crust is the part that intimidates home bakers. The thought of achieving that perfect flaky, tender crust can seem daunting. But what if we told you there’s a kitchen gadget that can make this process significantly easier and yield fantastic results? That’s right, your food processor is about to become your new best friend in the pie-making journey!
In this comprehensive guide, you’ll discover how to make a pie crust in a food processor. We’ll break down the entire process, from choosing your ingredients to chilling the dough. You’ll learn the simple steps that transform basic ingredients into a beautifully tender and flaky crust, ready to hold your favorite fillings. Forget the stress and embrace the ease – let’s get started on creating homemade pie crusts that will impress everyone!
## Why Use a Food Processor for Pie Crust?
Before we dive into the “how,” let’s talk about the “why.” Using a food processor for pie crust offers several advantages:
*
Speed: It significantly cuts down the time needed to combine ingredients compared to traditional methods.
*
Texture: The controlled pulsing action effectively cuts cold butter into the flour, creating those desirable flaky layers without overworking the dough.
*
Consistency: It’s easier to achieve a consistent texture, ensuring your crust bakes up beautifully every time.
*
Less Effort: It requires less physical effort and is ideal for those who may have difficulty with manual dough preparation.
If you’re looking to upgrade your kitchen tools for even more efficiency, exploring the best bargain food processor or a cheap and best food processor could be a worthwhile investment.
## Gather Your Ingredients
The foundation of any great pie crust is good quality, cold ingredients. For a standard 9-inch double pie crust, you will need:
*
2 ½ cups all-purpose flour: Make sure it’s a good quality, unbleached all-purpose flour for the best texture.
*
1 teaspoon salt: Enhances the flavor of the crust.
*
1 cup (2 sticks) unsalted butter, very cold: This is crucial! The butter needs to be as cold as possible. Cut it into ½-inch cubes and keep it in the refrigerator or even the freezer until you’re ready to use it.
*
½ cup ice water: Start with ice water. You might not need all of it. The coldness helps keep the butter solid.
## Step-by-Step: Making Your Pie Crust
This process is designed to be straightforward and efficient. Follow these steps carefully for the best results.
## Step 1: Prepare Your Food Processor
Ensure your food processor is clean and dry. Attach the standard metal blade. If you have a smaller food processor, you might need to work in two batches to avoid overcrowding.
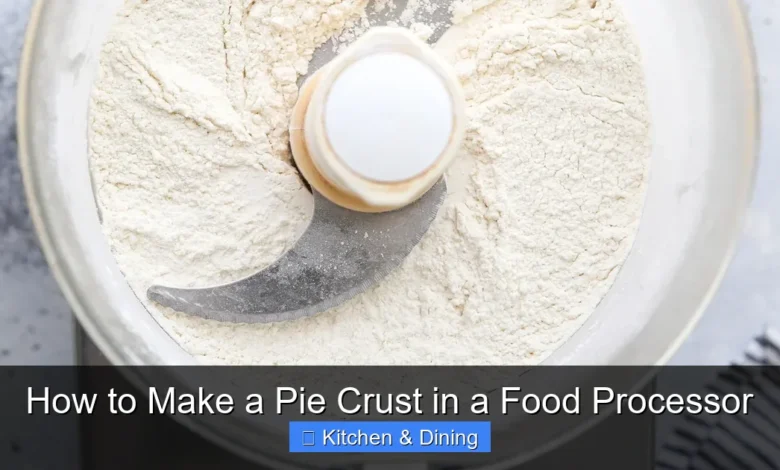
## Step 2: Combine Dry Ingredients
Add the flour and salt to the bowl of your food processor.
Pulse a few times to combine them evenly. This ensures the salt is distributed throughout the flour.
## Step 3: Add the Cold Butter
This is where the magic begins. Add the cubes of very cold butter to the flour mixture in the food processor.
Now, it’s time to pulse! Pulse the butter into the flour mixture in short bursts, about 1-2 seconds each. You want to achieve a consistency where the butter is cut into pieces ranging from coarse meal to small pea-sized pieces. Some larger, flat pieces of butter are actually good, as they will create steam pockets during baking, leading to flakiness.
Tip: Do not over-process at this stage. You are not trying to make a paste or incorporate the butter fully. The goal is distinct pieces of butter suspended in the flour.
## Step 4: Gradually Add Ice Water
This is a critical step for binding the dough without developing too much gluten, which can make the crust tough.
With the food processor running on low speed, or by pulsing intermittently, gradually add the ice water. Start by adding just a tablespoon or two at a time.
Continue to pulse or process until the dough just begins to come together. It should look shaggy and start to clump. You should be able to pinch some of the mixture together, and it should hold its shape.
Important: You might not need all ½ cup of water, or you might need a tiny bit more. The amount of water needed can vary depending on the humidity and the flour used. Stop adding water as soon as the dough starts to form clumps.
Troubleshooting Tip: If you accidentally add too much water and the dough becomes too wet and sticky, add a tablespoon of flour and pulse a few times. If it’s too dry and crumbly and won’t hold together, add another tablespoon of ice water and pulse briefly.
## Step 5: Form the Dough
Once the dough has started to come together, stop the food processor. Do not overmix! Overworking the dough develops gluten, making your crust tough and chewy instead of tender and flaky.
Turn the dough out onto a lightly floured surface. It will likely look a bit messy and shaggy. Gently bring the dough together with your hands, pressing it lightly until it forms a cohesive ball. You are not kneading here; you are just gathering it.
Divide the dough in half. For a double-crust pie, you’ll want two discs. For a single-crust pie, you’ll only need one disc, and you can freeze the other half for later use.
Flatten each portion into a disc, about ¾ inch thick. This makes it easier to roll out later.
## Step 6: Chill the Dough
This is perhaps the most important resting period for your pie crust. Chilling allows the gluten to relax, makes the butter firm up again, and makes the dough much easier to handle.
Wrap each disc tightly in plastic wrap. Make sure there are no air pockets.
Place the wrapped dough discs in the refrigerator for at least 30 minutes, but preferably 1-2 hours. You can also refrigerate it for up to 2 days, or freeze it for up to 3 months.
## Step 7: Roll Out the Dough
When you’re ready to bake your pie, take one disc of chilled dough out of the refrigerator. Let it sit at room temperature for about 5-10 minutes if it’s very firm, just enough to make it pliable but still cold. If you are looking for the best way to grease a cake pan, make sure your pie plate is ready to go!
Lightly flour your work surface and your rolling pin. Place the dough disc on the floured surface and begin rolling from the center outwards. Rotate the dough frequently to prevent it from sticking and to ensure even thickness.
Roll the dough into a circle that is about 12 inches in diameter for a standard 9-inch pie plate. It should be about ⅛ inch thick.
## Step 8: Transfer to Pie Plate
Carefully transfer the rolled-out dough to your pie plate. You can do this by gently folding it in half or quarters, then unfolding it once it’s in the plate, or by loosely rolling it around your rolling pin and then unrolling it over the plate.
Press the dough gently into the bottom and up the sides of the pie plate. Trim any excess dough, leaving about a 1-inch overhang. Fold the overhang under and crimp the edges as desired.
If you are making a double-crust pie, repeat the rolling and transferring process with the second disc of dough. You can cut vents in the top crust or create decorative cutouts before placing it over your filling.
## Practical Tips for Pie Crust Perfection
*
Keep Everything Cold: This cannot be stressed enough. Cold butter and cold water are essential for a flaky crust. If your kitchen is very warm, you might even consider chilling the flour for a bit.
*
Don’t Overwork the Dough: Overmixing develops gluten, leading to a tough crust. The food processor helps with this, but you still need to be mindful when bringing the dough together by hand.
*
The “Shaggy” Dough Stage: Don’t be alarmed if the dough looks a bit messy and shaggy in the food processor. This is exactly what you want before adding enough water to bind it.
*
Resting is Key: Chilling the dough is not optional. It allows the fats to re-firm and the gluten to relax, resulting in a tender crust.
*
Blind Baking: For some pies (like cream pies or quiches), you’ll need to “blind bake” the crust before adding the filling. This involves partially or fully baking the crust without filling. You can find great tips on this process online or in pie recipes.
*
Experiment with Fats: While this recipe uses all butter, you can experiment with combinations of butter and shortening for different textures and flakiness. For a beginner, all-butter is usually the most straightforward to get great results with.
## Troubleshooting Common Pie Crust Problems
Even with the best intentions, sometimes things don’t go perfectly. Here are some common issues and how to address them:
*
Tough Crust: This is usually due to overworking the dough, which develops too much gluten. Ensure you are pulsing the butter and only bringing the dough together gently by hand. Make sure you are using cold ingredients and chilling the dough sufficiently.
*
Crumbly/Dry Crust: This often means not enough water was added. You can try to fix it by adding a tablespoon of ice water and pulsing a few more times. If the dough is already out of the processor, you can try gently working in a tiny bit more water. However, if it’s too far gone, you might need to start over.
*
Shrinking Crust: If your crust shrinks significantly in the pan, it’s often because the gluten wasn’t relaxed. Ensure you’re chilling the dough for long enough. Another trick is to gently push the dough up the sides of the pie plate without stretching it too thin.
*
Soggy Bottom: This can happen with wet fillings. Blind baking the crust is the best way to prevent a soggy bottom. You can also brush the bottom of the crust with an egg white after blind baking and before adding the filling for an extra barrier.
## Conclusion
Making a pie crust in a food processor is a fantastic shortcut to achieving a delicious, flaky homemade crust without the fuss. By following these simple steps and keeping your ingredients cold, you can confidently create pie crusts that are as beautiful as they are tasty. Whether you’re a seasoned baker or just starting out, this method is a game-changer. So, dust off your food processor, gather your ingredients, and get ready to bake the pie of your dreams! Your friends and family will be asking for your secret – and you can tell them it’s as easy as using your food processor.
Key Takeaways
- Effortless Mixing: A food processor drastically speeds up the pie crust-making process, combining ingredients in seconds.
- Perfect Texture: The pulsed action of a food processor helps create the ideal flaky texture by cutting cold butter into the flour.
- Consistent Results: Using a food processor ensures more consistent dough texture compared to hand-mixing.
- Minimal Handling: This method requires less handling of the dough, which is crucial for preventing a tough crust.
- Versatile Dough: The resulting dough is perfect for various pies, including fruit pies, cream pies, and savory quiches.
- Easy Cleanup: Most of the mixing is done in the food processor bowl, simplifying cleanup.


