
Discover how to safely and effectively eliminate mold from your electric kettle. This comprehensive guide walks you through simple cleaning steps using common household items to ensure your water is always fresh and healthy. Don’t let mold compromise your beverages; learn the best practices for keeping your kettle pristine.
Mold in your electric kettle might sound alarming, but it’s a common issue that can be easily tackled with the right approach. If you’ve noticed fuzzy patches, a musty smell, or discolored spots inside your kettle, it’s time to take action. This guide will walk you through effective, safe, and simple methods to get rid of mold in your electric kettle, ensuring your water is always clean and your morning brew is perfect. We’ll cover everything from identifying the problem to implementing the best cleaning solutions and preventative measures.
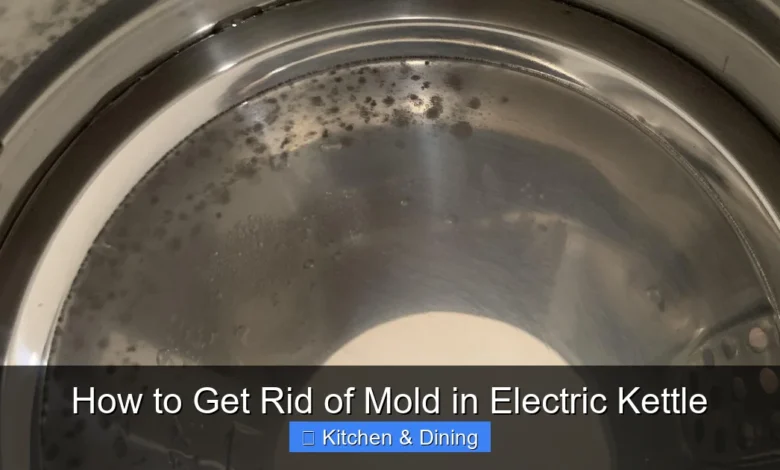
Understanding why mold grows in your electric kettle is the first step toward keeping it at bay. Mold thrives in damp, dark environments with organic matter. Inside a kettle, this often means leftover water, mineral deposits, or even tiny food particles from the water you’re boiling. While the boiling process itself can kill many mold spores, it doesn’t always eliminate existing mold, and spores can quickly regrow in any residual moisture. Fortunately, you don’t need harsh chemicals to solve this problem. We’ll focus on safe and readily available household ingredients.
### Why is Mold in an Electric Kettle a Problem?
Before we dive into the “how-to,” let’s quickly touch on why it’s important to remove mold. Ingesting mold can cause health issues, especially for those with allergies or weakened immune systems. Beyond the health risks, mold can impart an unpleasant taste and smell to your water, affecting the flavor of your tea, coffee, or any other beverage you prepare. Keeping your kettle clean ensures both safety and optimal taste.
## Step-by-Step Guide to Getting Rid of Mold in Your Electric Kettle
Dealing with mold in your electric kettle is straightforward. The key is to use gentle yet effective cleaning agents and to be thorough. Here are the best methods:
### Method 1: The White Vinegar Power Wash
White vinegar is a champion when it comes to natural cleaning. Its acidity helps to kill mold and bacteria, and it’s also excellent at dissolving limescale, which often accompanies mold.
#### Step 1: Safety First – Unplug and Cool Down
This is the most crucial step for any appliance cleaning. Ensure your electric kettle is unplugged from the power outlet. Also, make sure the kettle has cooled down completely if it was recently used. Dealing with hot liquids or electricity is dangerous, so always prioritize safety.
#### Step 2: Prepare the Vinegar Solution
For a standard-sized electric kettle (around 1-1.7 liters), you’ll need a mixture of equal parts white vinegar and water. Pour about 1-2 cups of white vinegar into the kettle, and then add an equal amount of water. The goal is to have enough solution to cover the affected areas, ideally the entire interior surface.
#### Step 3: Let It Soak
Once the solution is in the kettle, close the lid and let it sit for at least 30 minutes. For stubborn mold or significant limescale buildup, you might need to let it soak for an hour or even longer. You can even let it sit overnight if the mold is particularly persistent.
#### Step 4: Gentle Scrubbing (If Needed)
After soaking, empty the vinegar and water solution. Use a soft sponge or a soft-bristled brush (like an old toothbrush) to gently scrub any remaining mold or discolored areas. Avoid using abrasive scrubbers or steel wool, as these can scratch the interior of your kettle.
#### Step 5: Rinse Thoroughly
This step is vital to remove all traces of vinegar. Fill the kettle with clean water and boil it. Once boiled, discard the water. Repeat this rinsing and boiling process at least two to three more times to ensure no vinegar residue remains. You can smell the water after boiling; if you still detect a vinegar odor, do another rinse cycle.
#### Step 6: Final Wipe and Dry
After the final rinse, empty the kettle. Use a clean, soft cloth to wipe the interior dry. Leave the lid open and allow the kettle to air dry completely before storing it or using it again. This prevents new mold from forming.
### Method 2: Baking Soda for Mild Mold and Deodorizing
If you have only minor mold spots or are sensitive to vinegar smells, baking soda is a gentler, yet effective, alternative. It’s also a great natural deodorizer.
#### Step 1: Safety First – Unplug and Cool Down
As with the vinegar method, always unplug your electric kettle and ensure it has cooled down before you begin cleaning.
#### Step 2: Create a Baking Soda Paste
In a small bowl, mix a few tablespoons of baking soda with just enough water to form a thick paste. You want a consistency that you can easily spread but won’t drip everywhere.
#### Step 3: Apply the Paste
Use a soft cloth or sponge to apply the baking soda paste directly onto the moldy areas inside the kettle. Gently rub the paste into the stains. For more stubborn spots, you can let the paste sit for about 15-20 minutes before scrubbing.
#### Step 4: Gentle Scrubbing
Using a soft sponge or brush, gently scrub the paste and the mold away. The baking soda acts as a mild abrasive to lift the mold without damaging the kettle’s surface.
#### Step 5: Rinse and Boil
Discard the baking soda paste. Fill the kettle with fresh water and boil it. Discard this water. Repeat the boiling and discarding process at least once more to ensure all baking soda residue is gone.
#### Step 6: Final Wipe and Dry
After the final rinse, wipe the interior of the kettle dry with a soft cloth. Allow it to air dry completely with the lid open.
### Method 3: Lemon Juice for a Natural Touch
Lemon juice offers a natural way to tackle mold due to its citric acid content. It’s also a great way to leave your kettle smelling fresh.
#### Step 1: Safety First – Unplug and Cool Down
Remember to unplug your electric kettle and let it cool before you start cleaning.
#### Step 2: Juice Some Lemons
Juice one or two fresh lemons. You’ll need about 1/2 cup to 1 cup of lemon juice. You can add a bit of water to the juice if you want to dilute it slightly, but pure juice works well.
#### Step 3: Fill and Soak
Pour the lemon juice into the kettle. If you’re diluting it, add water to match the volume of the lemon juice. Close the lid and let it sit for at least 30 minutes. For tougher mold, extend the soaking time.
#### Step 4: Scrub and Rinse
Empty the lemon juice. Gently scrub any remaining mold with a soft sponge or brush. Rinse the kettle thoroughly with fresh water. You can boil water and discard it a couple of times to ensure all lemon residue is gone.
#### Step 5: Dry Properly
Wipe the interior dry with a soft cloth and leave the lid open to air dry completely.
## Troubleshooting Common Kettle Cleaning Issues
Sometimes, even with these methods, you might encounter a persistent problem. Here’s how to deal with it.
### Problem: Mold Returns Quickly
Cause: This usually means the mold wasn’t fully eradicated, or there’s a consistently damp environment. You might also have a contributing factor like mineral buildup that harbors mold spores.
Solution: Ensure you’re following the cleaning steps thoroughly. For vinegar cleaning, try a longer soaking time. After cleaning, make sure the kettle is always dried completely. Leaving a small amount of water in the kettle is a common mistake that encourages mold. Also, consider the water quality in your area; if you have very hard water, you might need to descale more frequently.
### Problem: Stubborn Stains Don’t Budge
Cause: Deep-set mold or very old mineral deposits can be tough to remove.
Solution: For vinegar cleaning, try a stronger concentration (e.g., more vinegar, less water) and let it soak for several hours or overnight. For baking soda, create a thicker paste and let it sit on the stains for longer before scrubbing. If these natural methods aren’t working and the mold is severe, you might need to consider a specialized kettle descaler or cleaner, but always follow the product instructions carefully and rinse extremely thoroughly afterward.
### Problem: Lingering Odors
Cause: Mold spores or cleaning solution residue can leave behind unpleasant smells.
Solution: A thorough rinse is key. For vinegar or lemon juice, boil and discard the water multiple times until the smell is gone. You can also try boiling a kettle full of plain water with a tablespoon of baking soda dissolved in it, then discard and rinse again. Ensure the kettle is completely dry before storing.
## Preventing Mold in Your Electric Kettle
The best way to deal with mold is to prevent it from appearing in the first place. Here are some simple habits that will keep your kettle mold-free:
### 1. Empty After Every Use
This is arguably the most important preventative measure. Don’t leave water sitting in your electric kettle once you’re done with it. Pour out any leftover water immediately after use.
### 2. Dry the Interior
After emptying, give the inside of the kettle a quick wipe with a soft, dry cloth. Leaving the lid open for a while to allow it to air dry completely is also a good practice. Moisture is mold’s best friend!
### 3. Regular Descaling
Mineral buildup (limescale) provides a surface for mold to cling to and grow. Regularly descale your kettle, especially if you have hard water. The vinegar method described above is excellent for both mold removal and descaling.
### 4. Occasional Cleaning
Even with daily rinsing and drying, a quick clean with vinegar or baking soda once a month can go a long way in preventing mold and keeping your kettle in top condition. This is also a good time to check for any early signs of mold or limescale.
### 5. Proper Storage
When not in use, store your kettle with the lid open. This allows for air circulation and helps prevent moisture buildup inside.
## Conclusion
Getting rid of mold in your electric kettle is a manageable task that ensures you have clean, healthy water for your favorite beverages. By using simple, natural cleaning agents like white vinegar, baking soda, or lemon juice, you can effectively tackle mold without resorting to harsh chemicals. Remember to always prioritize safety by unplugging the kettle and letting it cool down. Regular cleaning, thorough rinsing, and proper drying are your best defenses against future mold growth. By incorporating these simple habits into your routine, you can enjoy peace of mind and a perfectly brewed drink every time.
Key Takeaways
- Regular cleaning is key: Prevent mold growth by rinsing and wiping your kettle after each use.
- Vinegar is a powerful mold killer: Diluted white vinegar effectively breaks down mold and mineral deposits.
- Baking soda offers gentle scrubbing: It’s a great alternative for removing light mold and deodorizing.
- Lemon juice provides a natural alternative: Its acidity can help kill mold and leave a fresh scent.
- Always unplug and cool down: Safety first – ensure the kettle is off and cool before cleaning.
- Rinse thoroughly: After cleaning, a thorough rinse is crucial to remove any cleaning solution residue.
- Dry completely: Moisture is mold’s best friend; ensure the kettle is dry inside and out after cleaning.


