A blender jar that refuses to lock in place can halt your kitchen creativity. This guide dives into the common culprits, from debris to damaged parts, and offers clear, step-by-step solutions. With a little patience and these tips, you’ll secure your blender jar and be back to making smoothies and sauces in no time.
Is your blender jar refusing to click into place? Don’t let a stubborn blender jar put a damper on your culinary adventures! Whether you’re trying to whip up a morning smoothie, blend a savory soup, or create a silky sauce, a blender that won’t lock is a frustrating problem. Fortunately, most of the time, this issue is quite common and can be fixed with a few simple steps.
In this comprehensive guide, we’ll walk you through the most frequent reasons why your blender jar might not be locking securely, and provide you with practical, easy-to-follow solutions. You’ll learn how to identify the problem, perform basic maintenance, and get your blender back to its prime working condition. Let’s get your blender ready for action!
Key Takeaways
- Inspect the Jar and Base for Debris: Small food particles or cleaning residue can prevent the jar from seating properly.
- Check the Gasket and Blade Assembly: A loose or damaged gasket, or a blade assembly that isn’t screwed in tight, can cause locking issues.
- Examine the Locking Mechanism: Look for bent or broken tabs on the jar or notches on the blender base.
- Ensure Proper Jar Alignment: Sometimes, it’s as simple as not aligning the jar correctly with the base.
- Consider Wear and Tear: Older blenders may have worn parts that need repair or replacement.
- Safety First: Always unplug your blender before attempting any troubleshooting or cleaning.
Why Won’t My Blender Jar Lock? Common Causes
Before we jump into fixing it, it’s helpful to understand why this problem occurs. Blender jars typically lock into the base using a system of tabs on the jar that fit into corresponding grooves or notches on the blender base. This mechanism ensures the blender operates safely and efficiently. When the jar doesn’t lock, it means something is obstructing this connection. The most common culprits include:
- Foreign debris or residue
- Damaged or misaligned parts
- Wear and tear over time
Step-by-Step Guide to Fixing a Blender Jar That Won’t Lock
Follow these steps methodically to diagnose and resolve the issue with your blender jar. Remember, safety is paramount, so always unplug your blender from the power outlet before you begin any inspection or cleaning.
Step 1: Safety First – Unplug Your Blender
This is the most critical first step. Never attempt to inspect or clean any part of your blender while it’s plugged in. A blender has sharp blades, and an unexpected start-up could lead to serious injury.
Action: Locate the power cord and unplug the blender from the wall socket.
Visual guide about How to Fix a Blender Jar That Will Not Lock in Place
Image source: images-na.ssl-images-amazon.com
Step 2: Visually Inspect the Jar and the Base
Often, the simplest problems have the simplest solutions. A quick visual inspection can reveal a lot.
Check the Blender Jar Rim and Locking Tabs
Turn the blender jar upside down and examine the rim where it meets the base. Look closely at the tabs or notches on the bottom of the jar. Are they clean? Are any of them bent, chipped, or broken?
Check the Blender Base and Grooves
Now, look at the blender base where the jar sits. Inspect the grooves or slots where the jar’s tabs are supposed to engage. Is there any dried food, gunk, or foreign object stuck in these areas? Are the grooves themselves damaged or warped?
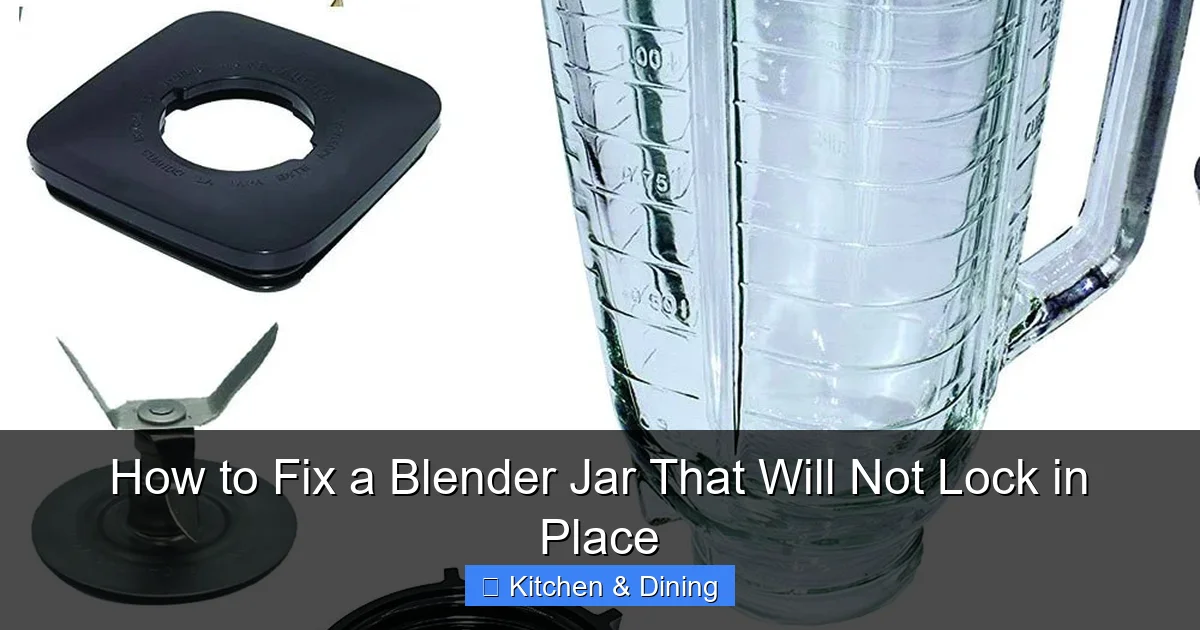
Look for Gasket Issues
The gasket is the rubber seal between the blade assembly and the jar. If it’s dislodged, torn, or has residue stuck to it, it can prevent the jar from seating properly. You might need to unscrew the blade assembly from the jar for a closer look at this. Remember to do this over a soft surface, as there might be residual liquid inside.
Tip: Use a flashlight to get a better view of tight spots.
Step 3: Clean the Jar and Base Thoroughly
Debris is a very common reason for a blender jar not locking. Even small particles can throw off the alignment.
Cleaning the Blender Jar
If you found any residue or debris on the jar’s rim or tabs, clean it off. Use a damp cloth or sponge. For stubborn gunk, you can use a soft brush (like an old toothbrush) or a mild dish soap. Rinse the jar thoroughly and dry it completely.
Cleaning the Blender Base
For the blender base, use a damp cloth to wipe down the area where the jar sits and the locking grooves. Again, a soft brush can help get into tight corners. Be careful not to get water into any electrical components. Ensure the base is also completely dry.
Cleaning the Gasket and Blade Assembly
If you removed the blade assembly, clean the gasket and the blades. Ensure the gasket is seated evenly around the blade assembly. If the gasket looks damaged, it might need to be replaced. You can often buy replacement parts for popular blender models. If the gasket is just dirty, clean it gently and make sure it’s dry before reattaching the blade assembly.
Example: Dried smoothie remnants are a frequent culprit for sticking in the grooves of the blender base.
Step 4: Check for Damaged or Warped Parts
Sometimes, the locking mechanism itself is the problem.
Examine Jar Tabs
If you noticed any bent tabs on the jar, you might be able to gently bend them back into place using pliers. However, be very careful not to break them. If a tab is broken off, the jar may be irreparable.
Examine Base Grooves
If the grooves on the blender base appear warped or damaged, this could be due to heat or physical impact. If the damage is minor, cleaning might resolve the issue. If the plastic is melted or significantly deformed, it might be difficult to fix and could pose a safety hazard. In such cases, replacing the blender base might be necessary.
Inspect the Blade Assembly
Ensure the blade assembly is screwed tightly onto the bottom of the jar. A loose blade assembly can sometimes affect how the jar sits on the base.
Caution: Never force the jar if it feels like it’s not aligning correctly. This can lead to further damage.
Step 5: Ensure Proper Jar Alignment
This might sound obvious, but sometimes the simplest things are overlooked.
Align the Jar Correctly
Most blenders have an indicator mark on the jar and the base to help you align them correctly. Look for arrows, dots, or specific shapes that need to match up. Place the jar onto the base, ensuring it’s oriented in the correct direction before you try to twist or push it down to lock.
Test the Twist/Lock Action
Once you believe the jar is aligned, gently try to twist or push it into the locked position as per your blender’s design. It should move smoothly into place. If it still resists, stop and re-examine the previous steps.
Tip: Some bladders require you to push down firmly while twisting, while others only require a twist. Consult your blender’s manual if you’re unsure.
Step 6: Test the Blender
After cleaning and inspecting, it’s time to test if your efforts have paid off.
Reconnect Power
Once you’re confident everything is clean, dry, and properly aligned, plug your blender back into the power outlet.
Attempt to Lock the Jar
Place the jar on the base and try to lock it. If it clicks into place smoothly, congratulations! You’ve likely solved the problem.
Run a Quick Test (Optional but Recommended)
For peace of mind, you can run a very short test with a small amount of water. Add some water to the jar, lock it, and briefly turn the blender on a low setting. Check for leaks around the base and ensure it runs smoothly.
Note: If the jar still doesn’t lock, or if it feels wobbly or unsafe, do not use the blender. Proceed to the troubleshooting section.
Troubleshooting Common Issues
Even after following the steps above, some persistent problems might arise.
The Jar Locks, But Feels Loose
This could indicate a worn locking mechanism on either the jar or the base, or a slightly damaged gasket that isn’t creating a tight seal. If it’s very loose, it’s a safety concern, and you should consider replacement parts or a new blender. You might want to check out guides on the best household blenders to see if it’s time for an upgrade.
The Jar Locks Only in One Specific Position
This often points to a minor misalignment in the locking mechanism. Re-examine the tabs and grooves for any slight deformities or debris you might have missed. Sometimes, a very gentle filing (with fine-grit sandpaper) of a rough spot on a tab or groove can help, but this should be done with extreme caution and only if you’re comfortable with minor DIY.
The Blender Makes a Grinding Noise When Trying to Lock
This noise often signifies that the gears or locking mechanism are trying to engage but are being obstructed. Double-check all points of contact for debris. If the noise persists after thorough cleaning, it could be an internal mechanical issue within the blender base, which might be difficult to repair without professional help.
My Blender is an Older Model, and Parts Are Hard to Find
For older blenders, finding replacement jars, gaskets, or blade assemblies can be challenging. Check the manufacturer’s website first, then look at third-party appliance parts suppliers online. If parts are truly unavailable, it might be time to consider purchasing a new blender. Resources like reviews for the best blender food processor combinations can help you find a reliable replacement.
When to Consider Replacement Parts or a New Blender
If you’ve gone through all the steps and your blender jar still won’t lock securely, it’s time to assess the situation.
Damaged Components
If any part of the locking mechanism on the jar or base is visibly broken, cracked, or significantly warped, it’s likely time for replacement parts. For example, if a tab on the jar has snapped off, the jar is no longer safe to use. Similarly, if the base has melted or cracked plastic around the locking grooves, it’s a safety hazard.
Persistent Issues
If the problem is intermittent, or if the jar feels wobbly or unsafe even when “locked,” it’s best not to risk using the blender. Continually forcing a misaligned jar can cause damage to both the jar and the base.
Cost of Repairs vs. New Blender
Sometimes, the cost of replacement parts, especially for complex blenders, can approach the cost of a new, more modern appliance. Do some research on current blender models and compare prices. Consider if the investment in an older appliance is worthwhile compared to upgrading to a unit with better features and efficiency.
Conclusion
A blender jar that won’t lock into place is a common, but usually fixable, kitchen dilemma. By systematically inspecting for debris, checking for damage to the jar, base, and gasket, and ensuring proper alignment, you can often restore your blender to full working order. Remember always to prioritize safety by unplugging your appliance before any cleaning or inspection.
If simple cleaning and minor adjustments don’t resolve the issue, and you find significant damage to the locking components, it might be time to look for replacement parts or consider investing in a new blender. With a little care and attention, you’ll be back to blending your favorite recipes in no time!