
Learn how to cook a chicken breast in an air fryer for a quick, healthy, and delicious meal. This guide provides simple, step-by-step instructions, covering everything from preparation to checking for doneness. You’ll achieve perfectly cooked, tender chicken with a delightful crispness, making it a go-to method for busy weeknights.
# How to Cook a Chicken Breast in an Air Fryer
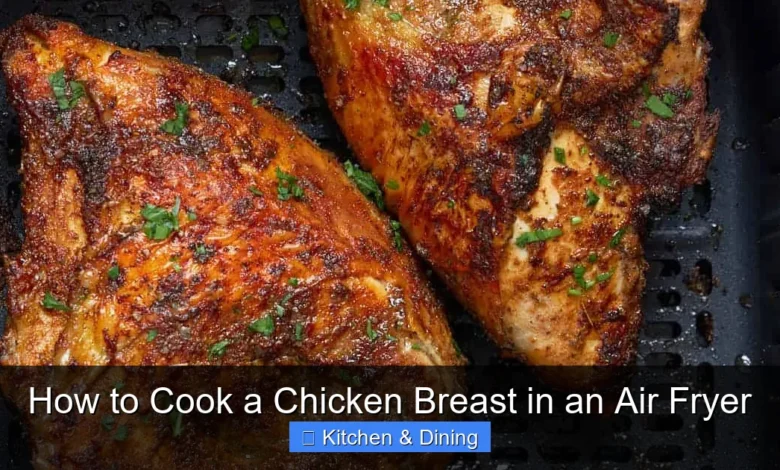
Are you looking for a fast, healthy, and incredibly delicious way to prepare chicken breast? Look no further than your air fryer! This kitchen marvel can transform a simple chicken breast into a culinary masterpiece in minutes. Forget dry, bland chicken; we’re talking about juicy, tender, and perfectly cooked results every single time.
In this comprehensive guide, you’ll learn everything you need to know to master cooking chicken breast in your air fryer. We’ll walk you through the simple steps, offer practical tips, and even touch on troubleshooting common issues. Whether you’re a seasoned cook or just starting out, you’ll be creating amazing air fryer chicken breasts with confidence. Let’s get cooking!
## Why Air Fry Chicken Breast?
Before we dive into the “how-to,” let’s quickly cover the “why.” Air fryers circulate hot air around your food, creating a crispy exterior while keeping the inside moist and tender. This method is fantastic for chicken breast because it mimics the results of deep-frying but with a fraction of the oil, making it a healthier choice. Plus, it’s significantly faster than baking or pan-searing, perfect for those busy weeknights.
If you’re curious about what makes an air fryer stand out, you might want to check out a review of the Instant Pot Vortex Plus 6Qt Clearcook Air Fryer to see some of the advanced features available.
## Getting Started: What You’ll Need
Cooking chicken breast in an air fryer is straightforward. Here’s a quick list of what you’ll need:
* **Chicken Breasts:** Boneless, skinless chicken breasts are the most common. You can also use bone-in, skin-on for a different texture.
* **Oil:** A little bit of oil helps with browning and crisping. Olive oil, avocado oil, or vegetable oil work well. You can use an oil mister for even coverage.
* **Seasonings:** Salt and black pepper are essential. Beyond that, the sky’s the limit! Garlic powder, onion powder, paprika, dried herbs like thyme or rosemary, or your favorite poultry seasoning blend.
* **Air Fryer:** Any standard air fryer will do.
* **Tongs:** For safely handling the chicken.
* **Instant-Read Thermometer:** This is your best friend for ensuring the chicken is cooked through safely.
## Step-by-Step Guide to Air Frying Chicken Breast
Let’s break down the process into simple, manageable steps.
### Step 1: Prepare the Chicken Breasts
The first step is to get your chicken breasts ready.
#### Trim Excess Fat
If your chicken breasts have any large pieces of fat, trim them off. This helps with even cooking.
#### Pound or Butterfly (Optional but Recommended)
For the most even cooking, especially with thicker chicken breasts, it’s a good idea to pound them to an even thickness. You can do this by placing the chicken breast between two pieces of plastic wrap or in a resealable bag and gently pounding it with a meat mallet or the bottom of a heavy pan. Aim for about a ¾-inch thickness throughout. If a breast is very thick in one part and thin in another, you can also butterfly it by slicing horizontally about halfway through, then opening it like a book.
If you’re looking for the right tools for the job, understanding the best knife to fillet chicken breast can be a great help in preparing your poultry.
#### Pat Dry
This is a crucial step for achieving a nice, crispy exterior. Use paper towels to pat the chicken breasts completely dry. Moisture is the enemy of crispiness!
### Step 2: Season the Chicken
Now comes the fun part – flavoring your chicken!
#### Apply Oil
Lightly coat each chicken breast with your chosen oil. You can brush it on or use an oil mister for even distribution. This helps the seasonings stick and promotes browning.
#### Add Seasonings
Sprinkle your desired seasonings generously over all sides of the chicken breasts. A classic combination is salt, pepper, garlic powder, and paprika. Don’t be afraid to experiment with your favorite spice blends! Ensure all surfaces are covered for maximum flavor.
### Step 3: Preheat Your Air Fryer
Preheating is important for getting that perfect sear and even cooking from the start.
#### Set the Temperature
Set your air fryer to 375°F (190°C).
#### Preheat Time
Let the air fryer preheat for about 3-5 minutes. Most air fryers will have a light that indicates when it’s ready.
### Step 4: Cook the Chicken
Time to get those chicken breasts into the air fryer!
#### Arrange in the Basket
Place the seasoned chicken breasts in a single layer in the air fryer basket. Make sure they are not overlapping. Overcrowding the basket will steam the chicken instead of air frying it, leading to uneven cooking and less crispiness. If you’re cooking more than two chicken breasts, you might need to cook them in batches.
#### Set the Cooking Time
For average-sized chicken breasts (about 6-8 ounces each) pounded to even thickness, start with 15-20 minutes. The exact time will depend on the thickness of your chicken breasts and the specific model of your air fryer.
#### Flip Halfway Through
About halfway through the cooking time (around 8-10 minutes), carefully flip the chicken breasts using tongs. This ensures both sides get beautifully golden brown and cooked evenly.
### Step 5: Check for Doneness
This is the most critical step for ensuring your chicken is safe to eat and perfectly cooked.
#### Use an Instant-Read Thermometer
Insert an instant-read thermometer into the thickest part of a chicken breast. It should register an internal temperature of 165°F (74°C).
* **If it’s not there yet:** Continue cooking in 2-3 minute increments, checking the temperature each time.
* **If it’s reached 165°F (74°C):** It’s ready!
#### Visual Cues (Use with Caution)
While a thermometer is the most reliable method, visually, the juices should run clear when pierced with a fork, and the chicken should be opaque white throughout. However, always rely on the thermometer for accuracy.
### Step 6: Rest the Chicken
Don’t skip this step! Resting allows the juices to redistribute throughout the meat, resulting in a more tender and moist chicken breast.
#### Remove from Air Fryer
Carefully remove the cooked chicken breasts from the air fryer basket.
#### Tent with Foil
Place them on a plate or cutting board and loosely tent them with aluminum foil.
#### Resting Time
Let them rest for 5-10 minutes before slicing or serving.
## Tips for Perfect Air Fryer Chicken Breast
Here are some extra tips to help you achieve chicken breast perfection:
* **Don’t Overcook:** Chicken breast can dry out quickly. Keep a close eye on it, especially during the last few minutes of cooking. Using a thermometer is your best defense against overcooking.
* **Experiment with Marinades:** While this guide focuses on quick seasoning, marinating chicken breast for at least 30 minutes (or up to a few hours in the fridge) can add even more flavor and moisture. Just be sure to pat it dry after marinating before seasoning and air frying.
* **Frozen Chicken Breast:** You *can* cook frozen chicken breasts in the air fryer, but it will take longer (add about 5-10 minutes to the cooking time) and the texture might not be as optimal. It’s best to thaw them first.
* **Adjust for Thickness:** Thicker breasts will take longer than thinner ones. Always rely on your thermometer.
* **Crispy Skin Option:** If you’re using bone-in, skin-on chicken breasts, ensure the skin is dry and consider increasing the temperature slightly towards the end of cooking for extra crispiness.
* **Cleaning Your Air Fryer:** For optimal performance and longevity, make sure to clean your air fryer regularly. Refer to your model’s manual, but generally, wiping down the basket and interior with a damp cloth after it cools is recommended. If you need deeper cleaning, there are guides on how to clean appliances that can offer general tips.
## Delicious Ways to Serve Air Fryer Chicken Breast
Once your air fryer chicken breast is cooked and rested, the possibilities are endless!
* **Salads:** Slice or dice it and add it to your favorite green salads.
* **Sandwiches and Wraps:** Perfect for a quick lunch.
* **Bowls:** Serve over rice, quinoa, or a bed of roasted vegetables.
* **With Sides:** Enjoy it alongside roasted potatoes, steamed broccoli, or a fresh salad.
* **Pasta Dishes:** Add sliced chicken to your favorite pasta recipes.
### Example: Simple Lemon Herb Air Fryer Chicken Breast
Here’s a quick recipe to get you started:
**Ingredients:**
* 2 boneless, skinless chicken breasts
* 1 tablespoon olive oil
* 1 teaspoon dried thyme
* 1 teaspoon dried rosemary
* ½ teaspoon garlic powder
* Salt and black pepper to taste
* Lemon wedges for serving
**Instructions:**
1. Preheat air fryer to 375°F (190°C).
2. Pat chicken breasts dry.
3. Brush with olive oil.
4. In a small bowl, mix thyme, rosemary, garlic powder, salt, and pepper.
5. Sprinkle the herb mixture evenly over both sides of the chicken breasts.
6. Place chicken in the preheated air fryer basket in a single layer.
7. Air fry for 15-20 minutes, flipping halfway through.
8. Check the internal temperature; it should be 165°F (74°C).
9. Remove from air fryer and let rest for 5-10 minutes.
10. Serve with lemon wedges.
This simple recipe highlights how easy it is to get flavorful chicken with minimal effort.
## Troubleshooting Common Air Fryer Chicken Breast Issues
Even with the best instructions, sometimes things don’t go perfectly. Here are a few common issues and how to fix them:
### Issue: Chicken is Dry and Tough
* **Cause:** Overcooked. This is the most common reason for dry chicken.
* **Solution:** Use an instant-read thermometer and pull the chicken out as soon as it reaches 165°F (74°C). Reduce cooking time in future batches. Ensure you are resting the chicken after cooking.
* **Cause:** Chicken was too thin or unevenly cooked.
* **Solution:** Pound chicken breasts to an even thickness or butterfly them.
### Issue: Chicken is Not Crispy
* **Cause:** Basket was overcrowded.
* **Solution:** Cook chicken in a single layer, without touching. Cook in batches if necessary.
* **Cause:** Chicken was not patted dry enough.
* **Solution:** Ensure you thoroughly pat the chicken breasts dry with paper towels before seasoning.
* **Cause:** Air fryer was not preheated.
* **Solution:** Always preheat your air fryer.
### Issue: Uneven Cooking
* **Cause:** Chicken breasts are different thicknesses.
* **Solution:** Pound them to an even thickness or butterfly them.
* **Cause:** Overcrowding the basket.
* **Solution:** Cook in a single layer without touching.
## Conclusion
Cooking chicken breast in an air fryer is a game-changer. It’s a fast, healthy, and incredibly versatile method that yields delicious results. With just a few simple steps – preparation, seasoning, preheating, cooking, checking temperature, and resting – you can create perfectly juicy and tender chicken breasts every time.
Experiment with different seasonings and serving ideas to make this a staple in your cooking repertoire. So grab your air fryer and get ready to enjoy some of the best chicken breasts you’ve ever made at home! Happy air frying!
- Effortless Preparation: Simple seasoning and no need for marinating if you’re short on time.
- Optimal Temperature and Time: Finding the sweet spot for cooking chicken breast at 375°F (190°C) for around 15-20 minutes, depending on thickness.
- Ensuring Doneness: Using an instant-read thermometer to check for an internal temperature of 165°F (74°C) is crucial for safety and texture.
- Crispy Perfection: Preheating the air fryer and not overcrowding the basket are key to achieving a golden-brown exterior.
- Resting is Key: Allowing the chicken to rest for 5-10 minutes after cooking locks in juices for a more tender bite.
- Versatile Cooking: Air fryer chicken breast is a base for salads, sandwiches, or can be enjoyed on its own.


