Properly storing your gas power washer during winter is crucial to prevent costly damage. This comprehensive guide walks you through every step, from fuel stabilization to engine protection. By following these instructions, you’ll ensure your power washer is ready for action next season, saving you time and money on repairs.
Gas Power Washer Storage and Winterization Guide
Your gas-powered pressure washer is a powerful tool for tackling tough cleaning jobs around your home. From dirty driveways to grimy siding, it can make a world of difference. But when the colder months roll in, and you’ve packed away your garden hoses, what do you do with your trusty power washer? Simply leaving it out in the elements or in an unheated garage is a recipe for disaster. Freezing temperatures can wreak havoc on its delicate components, leading to expensive repairs or even rendering it useless.
This comprehensive guide will walk you through the essential steps of properly storing and winterizing your gas power washer. By following these instructions, you’ll protect your investment, prevent damage caused by freezing, and ensure your power washer is ready to perform at its best when spring arrives. We’ll cover everything from fuel management and engine care to pump protection and general storage best practices. Let’s get started!
Key Takeaways
- Proper Fuel Management: Stabilizing or draining the fuel tank prevents gumming and carburetor damage during storage.
- Engine Protection: Running the engine after adding stabilizer ensures it circulates throughout the fuel system.
- Water Removal is Critical: Completely draining all water from the pump, hose, and spray gun prevents freezing and cracking.
- Lubrication Prevents Seizing: Applying a pump protector or antifreeze helps lubricate and protect internal pump components.
- Cleanliness is Key: Storing a clean power washer in a dry environment prevents rust and deterioration.
- Secure Storage: Protecting the unit from moisture and extreme temperatures extends its lifespan and performance.
Understanding Why Winterization is Essential
Before we dive into the “how-to,” it’s important to understand *why* this process is so vital. Gas power washers have several components that are susceptible to damage from freezing temperatures. The most vulnerable parts include:
- The Pump: This is the heart of your pressure washer. It contains seals, pistons, and valves that can crack or break if water inside them freezes and expands.
- The Engine: While more robust, extreme cold can still affect lubricants and cause condensation issues.
- Hoses and Accessories: Water trapped in hoses, spray guns, and wands can freeze, expand, and cause them to split or burst.
- The Fuel System: Stale fuel can form gummy deposits that clog the carburetor and fuel lines, leading to starting problems.
Proper winterization eliminates water and protects these components from the damaging effects of cold and moisture, ensuring your power washer has a long and productive life.
Step-by-Step Winterization Process
Let’s get down to business. Follow these steps carefully to winterize your gas power washer effectively.
Visual guide about Gas Power Washer Storage and Winterization Guide
Image source: powerpak.net
Step 1: Run the Engine and Stabilize the Fuel
The first crucial step involves your power washer’s fuel system. Leaving gasoline in the tank and carburetor over the winter can lead to gumming and corrosion, making it difficult to start next season. You have two main options: either stabilize the fuel or drain the tank completely.

Visual guide about Gas Power Washer Storage and Winterization Guide
Image source: islandpowersports.com
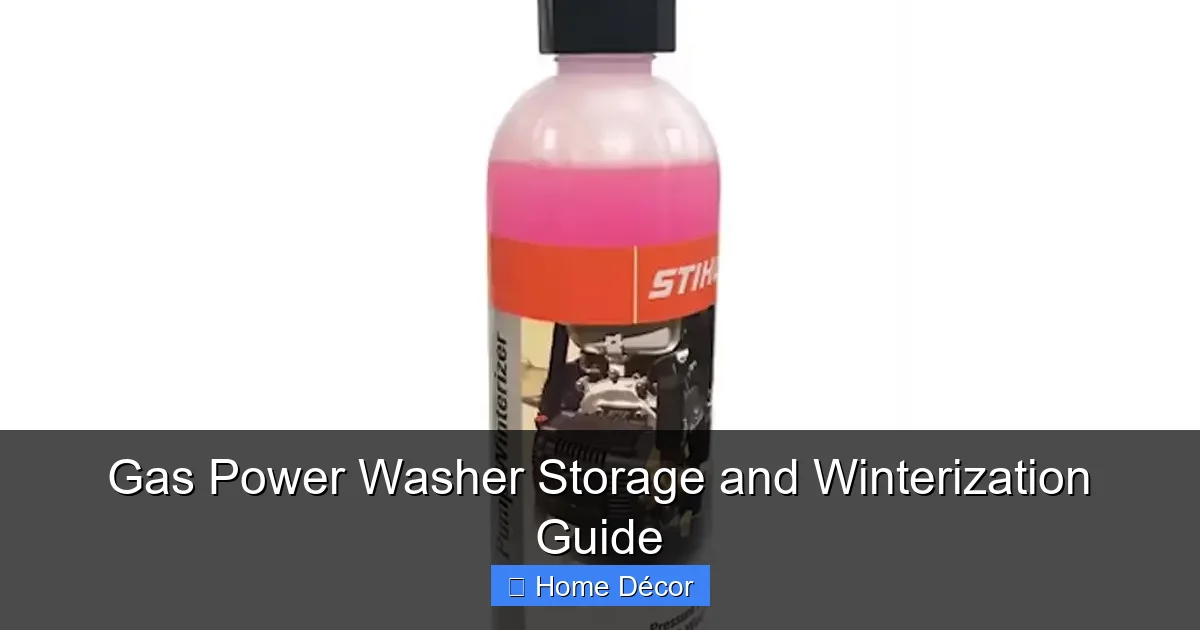
Option A: Stabilize the Fuel
This is the most common and recommended method. Fuel stabilizer is a chemical additive that prevents fuel from degrading and forming deposits. It’s readily available at auto parts stores and home improvement centers.
-
Add Fuel Stabilizer
Locate your power washer’s fuel tank. Add the amount of fuel stabilizer recommended by the product’s instructions. It’s generally about 1 ounce of stabilizer per gallon of fuel. If your tank is nearly empty, add enough fresh gasoline to adequately mix with the stabilizer, ensuring it reaches all parts of the fuel system.
-
Run the Engine
Once the stabilizer is added, start the engine and let it run for about 5-10 minutes. This is a critical step! Running the engine allows the stabilized fuel mixture to circulate throughout the entire fuel system, including the carburetor and fuel lines. This ensures that all components are protected from degradation.
Tip: Ensure you are running the engine in a well-ventilated area, away from any enclosed spaces, due to exhaust fumes.
Option B: Drain the Fuel Tank (Less Common for Most Users)
While less common for the average homeowner, some prefer to completely remove all fuel. This method eliminates any potential for fuel degradation but requires more careful handling of gasoline.
-
Drain the Tank
Using a siphon pump or by tilting the unit carefully (if safe to do so), drain all fuel from the tank into an approved fuel container. Be sure to do this in a well-ventilated area away from any ignition sources.
-
Start the Engine (to Clear Carburetor)
After draining the tank, start the engine and let it run until it sputters and dies. This will ensure that all residual fuel in the carburetor and fuel lines is consumed, preventing any gumming in these sensitive components.
Step 2: Prepare and Protect the Pump
The pump is the most vulnerable part to freezing. You need to remove all water and ideally add a protective substance.

Visual guide about Gas Power Washer Storage and Winterization Guide
Image source: tayloeslawncare.com
Remove All Water
This is a non-negotiable step. Any water left in the pump will freeze, expand, and crack the pump housing or internal components.
-
Disconnect Hoses
Make sure your pressure washer is turned off and has cooled down. Disconnect the garden hose from the water inlet and the high-pressure hose from the pump outlet. Remove the spray gun from the high-pressure hose.
-
Drain the Inlet Side
Tilt the pressure washer unit slightly forward to allow any water to drain from the water inlet on the pump. You can also use a small syringe or compressed air (at low pressure) to blow out any remaining water from the inlet connection.
-
Drain the High-Pressure Outlet
Similarly, tilt the unit to drain any residual water from the high-pressure outlet. Again, a gentle puff of compressed air can help here.
Add Pump Protector or Antifreeze
Once you’re certain all water is drained, you need to introduce a substance that will prevent freezing and lubricate the pump.
-
Use Pump Protector Fluid
Many manufacturers recommend using a specific “pump protector” fluid. This is typically a non-toxic antifreeze solution designed for pressure washer pumps. Follow the instructions on the product packaging carefully.
-
Introduce the Fluid
Typically, you’ll attach a short piece of hose (or even the siphon tube if your model has one) to the water inlet. Submerge the other end of the hose into your chosen pump protector fluid. Then, attach the garden hose to the inlet and crank the engine for a few seconds (or pull the starter cord a few times if the engine doesn’t start) to draw the fluid through the pump. You should see the fluid being pumped out of the high-pressure outlet. Run it until the fluid has been thoroughly drawn through the pump.
Alternative: If you don’t have a specific pump protector, some users opt for RV or marine antifreeze (non-toxic propylene glycol). NEVER use automotive antifreeze (ethylene glycol) as it is toxic and can damage seals.
-
Run Through the System
Once the pump protector is drawn into the pump, you can disconnect the garden hose and spray gun. Pull the starter cord a few more times to ensure the fluid is pushed through the pump and out the outlet, clearing any remaining water and coating the internal components.
Step 3: Clean the Power Washer
A clean machine is a happy machine, and it’s also less likely to suffer from corrosion during storage.
-
Wipe Down the Exterior
Use a damp cloth to wipe down the entire exterior of the power washer. Remove any dirt, grease, or debris. Pay attention to the engine casing, frame, and any other surfaces.
-
Clean Accessories
Wipe down the high-pressure hose, spray gun, and any nozzles. Ensure there is no residual water trapped inside them. Store them neatly, perhaps in a plastic bag to keep them clean and together.
-
Check Air Filter
Inspect the engine’s air filter. If it’s excessively dirty, clean or replace it. A clean air filter is important for engine health, even when in storage.
Step 4: Store the Power Washer
The environment where you store your power washer is as important as the winterization steps themselves.
-
Choose a Dry Location
Find a dry, protected location for storage. An unheated garage, a shed, or a basement are good options. Avoid storing it outdoors, even if covered, as moisture can still find its way in.
-
Keep it Elevated (Optional but Recommended)
If possible, store the power washer on a pallet or a sturdy platform. This helps to keep it off a potentially damp floor, reducing the risk of rust and corrosion.
-
Protect from Pests
Ensure that the storage area is free from rodents or insects, which can chew through wires or build nests in vents. You might consider placing mothballs or traps in the vicinity if this is a concern.
-
Cover the Unit
Once everything is dry and the unit is in its storage spot, cover it with a breathable tarp or cover. This will protect it from dust and any accidental bumps or scrapes.
Troubleshooting Common Winterization Issues
Sometimes, things don’t go exactly as planned. Here are a few common issues and how to address them.
Problem: I can’t get all the water out of the pump.
Solution: Be patient and persistent. Try tilting the unit at different angles. Using a shop vacuum with a hose attachment on the inlet or outlet can help suck out residual water. A gentle puff of compressed air (low PSI) can also dislodge stubborn water pockets. Remember, even a small amount of water can cause damage.
Problem: The engine won’t start after adding stabilizer.
Solution: Ensure you ran the engine long enough for the stabilized fuel to circulate. Check the spark plug for fouling. If it still won’t start, the fuel might not have been stabilized effectively, or there might be another issue unrelated to winterization. Refer to your owner’s manual for engine troubleshooting.
Problem: I don’t have pump protector fluid. What can I use?
Solution: As mentioned, non-toxic RV or marine antifreeze (propylene glycol) is a suitable alternative. Ensure it is rated for freezing temperatures and is safe for seals. Never use automotive antifreeze.
Preparing Your Power Washer for Spring
When spring finally arrives, and you’re eager to get back to cleaning, don’t just pull your power washer out and expect it to work flawlessly. A quick spring check-up will save you headaches.
-
Check Oil Levels
Ensure the engine oil level is correct according to your owner’s manual.
-
Inspect for Leaks
Before starting, look for any obvious signs of leaks, cracks, or damage that may have occurred during storage.
-
Reconnect Hoses
Attach the garden hose and the high-pressure hose securely.
-
Prime the Pump
Turn on the water supply to the inlet hose and let water flow through the pump for a minute or two to flush out any residual pump protector and ensure the pump is primed.
-
Start the Engine
Start the engine and check for normal operation. If you experience any issues, consult your owner’s manual or a service professional.
Conclusion
Properly storing and winterizing your gas power washer is an investment in its longevity and performance. By taking the time to follow these steps, you’re not just preventing damage from freezing temperatures; you’re ensuring that your power washer will be ready to tackle any cleaning job when the warmer weather returns. Remember, a little preparation now can save you a lot of time, money, and frustration later. Happy cleaning, and happy storing!