Preventing rust on your air fryer parts is crucial for its longevity and performance. This guide provides a detailed, step-by-step approach to drying every component properly after cleaning. By following these simple yet effective methods, you’ll ensure your air fryer stays rust-free and ready for delicious, healthy meals. Learn the best techniques to protect your investment and maintain optimal cooking results.
## Drying All Air Fryer Parts Properly to Prevent Rust
Your air fryer is a fantastic kitchen companion, turning out crispy fries, juicy chicken, and perfectly roasted vegetables with less oil. To keep it performing at its best and looking great for years to come, proper cleaning and, crucially, *proper drying* are essential. Many people focus on the cleaning aspect, but often overlook the importance of drying, which is the direct path to preventing dreaded rust. Rust can not only be unsightly but can also affect the performance and even the safety of your appliance.
This comprehensive guide will walk you through the entire process of drying all your air fryer parts effectively. We’ll cover everything from the removable basket and crisper plate to the interior and exterior, ensuring no moisture is left behind to cause damage. By the end of this guide, you’ll have the knowledge and confidence to keep your air fryer rust-free and ready for all your culinary adventures. Let’s dive in!
## Understanding Why Proper Drying is So Important
Before we get into the “how,” let’s quickly touch on the “why.” Air fryers, especially those with metal components like baskets, trays, and heating elements, are susceptible to rust. This happens when water, or even lingering moisture, sits on the metal surface for too long. Metal reacts with oxygen in the presence of water, a process we know as oxidation, which results in rust.
Rust can:
- Damage the non-stick coating: If your air fryer basket has a non-stick coating, rust can form underneath it, causing it to peel or flake.
- Affect cooking performance: Rust can interfere with heat distribution and the overall cooking environment.
- Lead to unsanitary conditions: Rust particles can contaminate your food.
- Shorten the appliance’s lifespan: A heavily rusted air fryer may need to be replaced sooner than necessary.
Therefore, taking a few extra minutes to dry everything thoroughly is a small investment for a significant return in terms of appliance longevity and food safety.
## Step-by-Step Guide to Drying Your Air Fryer Parts
The process is straightforward, but it requires attention to detail. We’ll break it down by component.
### Step 1: Disassemble and Inspect
The first step after cleaning is to take your air fryer apart as much as is safely possible. This usually means removing the basket, the crisper plate (if it’s a separate piece), and any other removable racks or accessories.
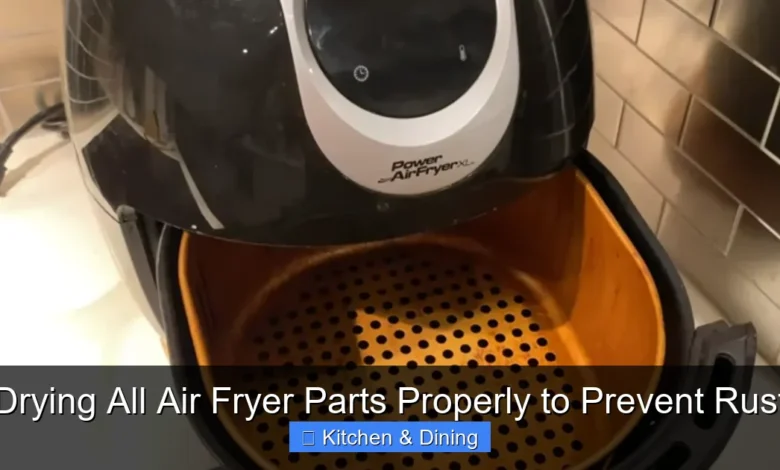
* **Basket:** This is the main workhorse and often the most exposed to moisture.
* **Crisper Plate/Insert:** This sits at the bottom of the basket.
* **Internal Components (Heating Element):** While not typically removed for cleaning, you’ll need to be aware of its presence.
* **Exterior:** The outside of your air fryer also needs a wipe-down.
### Step 2: The Initial Towel Dry
Once disassembled, the first line of defense against lingering moisture is a good old-fashioned towel dry.
#### Using the Right Towels
* Soft, Absorbent Cloths: Microfiber cloths are ideal. They are highly absorbent and soft enough not to scratch any surfaces, including non-stick coatings. You can also use clean cotton dish towels.
* Avoid Paper Towels for Initial Drying: While useful for certain tasks, paper towels can sometimes leave lint behind or tear, leaving small pieces stuck to wet surfaces. Save them for polishing or quick spills.
#### How to Towel Dry Each Part
1. Basket: Gently wipe down the entire interior and exterior of the basket. Pay close attention to the handle, the mesh or solid bottom, and the sides.
2. Crisper Plate: Thoroughly dry both sides of the crisper plate, ensuring you get into any perforations or grooves.
3. Other Accessories: If your air fryer came with additional racks or accessories, dry them with the same care.
### Step 3: The Crucial Air Drying Phase
Towel drying removes the bulk of the moisture, but some water can remain trapped in tiny crevices, under rims, or within the mesh of the basket. This is where air drying becomes paramount.
#### Ensuring Adequate Air Circulation
* Well-Ventilated Area: Place all the dried parts in a location with good air circulation. A countertop near an open window (weather permitting), on a drying rack, or even near a gently running fan can significantly speed up the process.
* Avoid Damp Environments: Do not leave parts to air dry in a steamy bathroom or a damp basement. The goal is to evaporate moisture, not to let it sit.
#### Specific Drying Techniques for Different Parts
1. Basket and Crisper Plate:
* Upside Down: For the basket, placing it upside down on a drying rack allows water to drain from the bottom and air to circulate freely inside.
* On Their Sides: For the crisper plate, standing it on its edge or propping it slightly allows air to reach both surfaces.
* Mesh Baskets: If you have a mesh basket, gently shake out any excess water before placing it to air dry. You might even be able to use a toothpick to gently dislodge water droplets from the mesh if needed.
2. Exterior of the Air Fryer:
* After wiping down the exterior, leave the air fryer with its basket *slightly ajar* or completely removed to allow the interior to air out. This is especially important if any water might have splashed onto the inside walls or near the heating element.
#### How Long Does Air Drying Take?
This depends on the humidity of your environment and the amount of moisture remaining. Typically, allowing parts to air dry for at least 30 minutes to an hour is recommended. For peace of mind, you can extend this to a couple of hours, or even until they are completely bone dry to the touch.
### Step 4: The Final Check and Reassembly
Before putting everything back together, give all the parts a final touch test.
* Feel for Dampness: Run your fingers over all surfaces, paying attention to seams, edges, and any hidden areas. If you feel any dampness, continue air drying.
* Visual Inspection: Look for any water droplets or condensation.
Once you are absolutely certain that all parts are completely dry, you can reassemble your air fryer. Store it with the basket slightly open if possible, to continue promoting air circulation inside and prevent any residual moisture from being trapped.
## Special Considerations for Specific Air Fryer Models
While the general principles apply to most air fryers, some models might have unique features that require a little extra attention.
### Models with Glass Lids or Components
If your air fryer has a glass lid or glass components, ensure they are dried thoroughly to prevent water spots and to maintain clarity. These can usually be towel-dried and then air-dried like other accessories.
### Air Fryers with Removable Heating Elements (Rare)
Some high-end or multi-function air fryers might have more complex designs. If your manual suggests removing the heating element for cleaning (this is very rare for standard air fryers, but more common in some oven-style models), ensure it is completely dry and that any electrical connections are free from moisture before reassembling. **Always consult your user manual for specific instructions related to disassembly and cleaning of specialized components.** For most standard basket-style air fryers, you will not be removing the heating element.
## Troubleshooting: What If I Think My Air Fryer Might Be Rusty?
If you’ve already noticed signs of rust, don’t panic! Depending on the severity, you might be able to salvage the situation.
### Minor Surface Rust
1. Gentle Scrubbing: For minor rust spots on stainless steel parts (like the exterior or some internal racks), you can try gently scrubbing with a paste made of baking soda and water. Use a soft cloth or a non-abrasive sponge.
2. Vinegar Solution: A mild solution of white vinegar and water can also help break down rust. Apply with a cloth, let it sit for a few minutes, and then wipe clean.
3. Thorough Rinse and Dry: After treating the rust, rinse the parts thoroughly and then follow the drying steps outlined above with extra diligence.
### Rust on Non-Stick Surfaces
Rust forming under a non-stick coating is a more serious issue. If the coating is peeling or damaged around the rust spots, it’s often best to consider replacing the basket or accessory. Continued use can release flakes of the coating and rust into your food. You can find replacement parts for many popular air fryer models, such as the Instant Pot Vortex Plus 6Qt Clearcook Air Fryer, which might have available accessories.
### Preventing Future Rust
* Immediate Cleanup: Clean your air fryer shortly after use.
* Shake Out Excess Oil/Grease: Before washing, shake out as much excess grease as possible.
* Avoid Soaking: Don’t leave the basket or crisper plate to soak in water for extended periods.
* Ensure Complete Dryness: This guide’s core message – always dry thoroughly.
* Check Your Dishwasher (If Applicable): If you run your air fryer parts through the dishwasher, ensure you use a drying cycle and also towel dry and air dry afterward, as dishwashers don’t always get into every nook and cranny. For information on effective drying in dishwashers, you might find details in articles about the best dishwashers for drying useful.
## Conclusion: A Dry Air Fryer is a Happy Air Fryer
Taking care of your air fryer involves more than just cooking. Proper cleaning is essential, but without proper drying, you risk compromising the longevity and performance of your appliance. By following these simple, step-by-step instructions, you can ensure that every part of your air fryer is thoroughly dried, preventing rust and keeping it in pristine condition.
Remember to be thorough, use soft materials, and allow ample time for air circulation. A few extra minutes dedicated to drying will pay dividends in the form of countless delicious and healthy meals from your trusty air fryer. Happy cooking, and more importantly, happy drying!
- Thoroughness is Key: Don’t overlook any part of your air fryer; even small crevices can trap moisture, leading to rust.
- Immediate Drying is Best: Aim to dry your air fryer parts as soon as you finish cleaning them.
- Gentle Materials Matter: Use soft, absorbent cloths and avoid abrasive scrubbers that can scratch surfaces.
- Air Circulation is Crucial: Allow parts to air dry completely in a well-ventilated area before reassembling.
- Targeted Drying: Pay special attention to areas like the basket’s base, heating element, and any nooks and crannies.
- Storage is Important: Ensure the air fryer is fully dry before storing it, ideally with the basket slightly ajar.