How to Make Milkshake Without Ice Cream in Blender
Discover how to create delicious milkshakes without ice cream using just your blender! This guide provides simple, step-by-step instructions and creative ingredient ideas to achieve a creamy and satisfying beverage. Say goodbye to needing ice cream and hello to a healthier, customizable milkshake option.
## How to Make Milkshake Without Ice Cream in Blender
Craving a creamy, delicious milkshake but don’t have any ice cream on hand? Don’t worry! It’s entirely possible to whip up a fantastic milkshake using just your blender and a few common kitchen staples. Forget the dairy aisle and the sugar overload of store-bought options. This guide will show you how to create satisfying, customizable milkshakes that are just as delightful as their ice cream-laden counterparts. We’ll explore the secrets to achieving that perfect creamy texture, dive into a variety of flavor combinations, and offer tips for making healthier versions. Get ready to transform your blender into a milkshake-making machine!
### Why Make Milkshakes Without Ice Cream?
There are many reasons why you might opt for an ice cream-free milkshake. Perhaps you’re looking for a healthier alternative, want to control the sugar content, or have dietary restrictions like lactose intolerance. Sometimes, you just plain run out of ice cream! Whatever your motivation, creating milkshakes without ice cream opens up a world of possibilities. You can experiment with different fruits, vegetables, and healthy fats to create a treat that’s both delicious and nourishing. It’s also a fantastic way to use up ripe bananas or other fruits that might otherwise go to waste. Plus, the process is incredibly simple, making it a go-to recipe for a quick snack or dessert.
### The Core Components of an Ice Cream-Free Milkshake
To make a successful ice cream-free milkshake, you need to understand the key elements that contribute to its taste and texture.
#### The Creamy Base
This is where the magic happens when you’re not using ice cream. You need ingredients that provide richness and body.
* Frozen Bananas: This is the undisputed champion of dairy-free milkshake bases. When frozen and blended, bananas create an incredibly thick, smooth, and creamy texture that mimics ice cream perfectly. The riper the banana, the sweeter your milkshake will be.
* Avocado: Don’t knock it till you try it! A small amount of ripe avocado (about 1/4 to 1/2 of one) adds incredible creaminess and healthy fats without a discernible avocado flavor, especially when combined with other strong flavors like cocoa or berries.
* Yogurt: Greek yogurt or regular yogurt (dairy or non-dairy) can add creaminess and a pleasant tang. Use plain yogurt to control sweetness and flavor. Greek yogurt is thicker and will give you a richer texture.
* Silken Tofu: For a neutral, creamy base, silken tofu is a surprisingly effective ingredient. It blends smoothly and absorbs other flavors well.
* Cooked and Chilled Sweet Potato or Pumpkin Puree: These can add a subtle sweetness, creaminess, and nutritional boost.
#### The Liquid
You need a liquid to help everything blend smoothly. The type of liquid you choose will also impact the flavor.
* Milk: Dairy milk (whole, 2%, skim) is a classic choice.
* Non-Dairy Milk: Almond milk, soy milk, oat milk, coconut milk, and cashew milk are all excellent alternatives. Each will impart its own subtle flavor. Oat milk is often praised for its creamy texture.
* Water: For a lighter option or if you’re sensitive to dairy or nuts, water works, but it won’t contribute to creaminess or flavor as much.
* Juice: While less common for a traditional milkshake, a splash of fruit juice can work for certain fruit-forward flavors.
#### The Flavor Enhancers
This is where you get to be creative!
* Fruits: Fresh or frozen berries, mango, peaches, pineapple, cherries.
* Cocoa Powder or Cacao Powder: For chocolate lovers.
* Nut Butters: Peanut butter, almond butter, cashew butter for richness and flavor.
* Sweeteners: Honey, maple syrup, dates, agave nectar, or a sugar-free sweetener. You might not need much if you’re using ripe bananas or sweet fruits.
* Spices: Cinnamon, nutmeg, cardamom, vanilla extract, peppermint extract.
* Add-ins: Oats, chia seeds, flax seeds, protein powder, coffee or espresso.
### Step-by-Step Guide to Making Your Milkshake
Making an ice cream-free milkshake is incredibly straightforward. Here’s how to do it:
#### Step 1: Prepare Your Ingredients
This is the most crucial step for ensuring a good result.
* Prepare Your Creamy Base: If using bananas, peel ripe bananas, break them into chunks, and freeze them in a single layer on a baking sheet or in a freezer bag for at least 4-6 hours, or until solid. For avocado, make sure it’s ripe and you only need about a quarter to half of one.
* Gather Your Liquids: Have your chosen milk or liquid ready.
* Measure Your Flavorings: Get your fruits, cocoa, nut butters, and sweeteners ready.
#### Step 2: Add Ingredients to the Blender
The order in which you add ingredients to your blender matters for optimal blending.
* Liquids First: Pour your chosen liquid into the blender jar first. This helps the blades move more freely and prevents thicker ingredients from getting stuck at the bottom.
* Add Softer Ingredients: Next, add any non-frozen fruits, yogurt, avocado, or silken tofu.
* Add Frozen Ingredients: Now, add your frozen bananas or other frozen fruits.
* Add Flavorings and Sweeteners: Finally, add your cocoa powder, nut butters, spices, and sweeteners.
#### Step 3: Blend Until Smooth
This is where your blender does its work.
* Start Slow: Begin blending on a low speed to break down the larger frozen pieces.
* Increase Speed: Gradually increase the blender speed to high.
* Blend Until Creamy: Continue blending until the mixture is completely smooth and has a thick, creamy consistency. This might take anywhere from 30 seconds to 2 minutes, depending on your blender’s power. If you’re using a powerful blender, you might be able to achieve a perfect milkshake in under a minute. For those with less powerful blenders, you may need to stop and scrape down the sides a couple of times.
* Check Consistency: If it’s too thick, add a little more liquid (a tablespoon at a time) and blend again. If it’s too thin, you can add a few more frozen banana pieces, a bit of ice (though this can dilute the flavor), or a tablespoon of chia seeds and let it sit for a few minutes to thicken.
#### Step 4: Taste and Adjust
Before pouring, give your milkshake a quick taste.
* Sweetness Check: Is it sweet enough? If not, add a little more sweetener and blend briefly.
* Flavor Check: Does it need a bit more of a certain flavor, like vanilla or cinnamon? Adjust accordingly and blend again.
#### Step 5: Serve Immediately
Milkshakes are best enjoyed right after they are made.
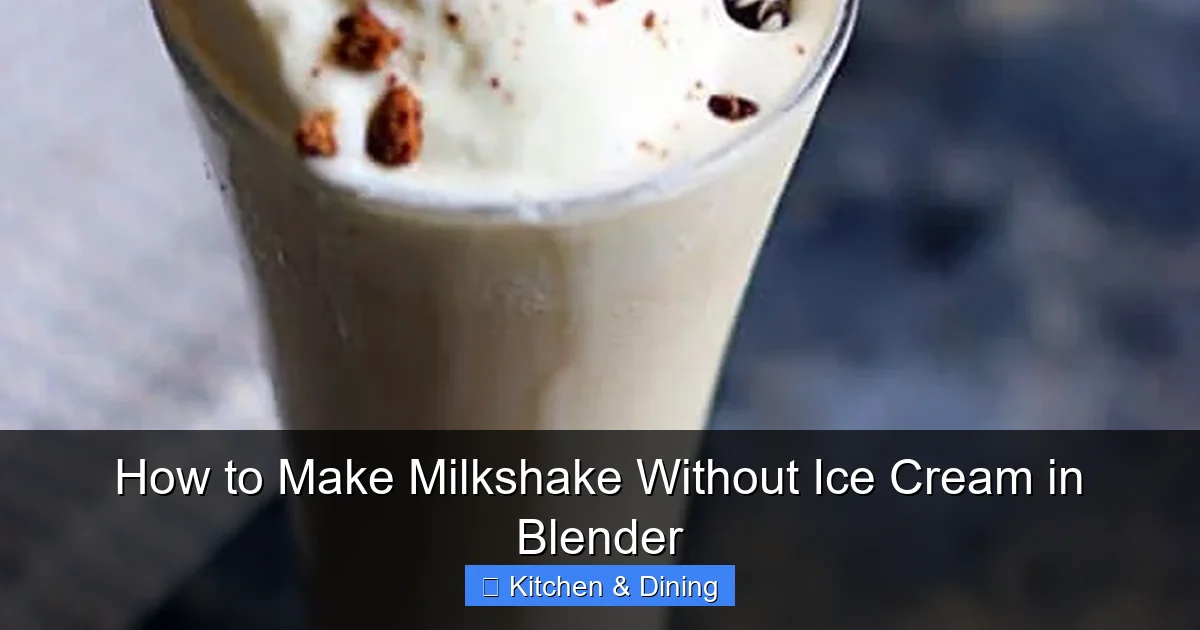
* Pour into a Glass: Pour your delicious creation into a tall glass.
* Add Toppings (Optional): You can garnish with whipped cream (dairy or coconut), a cherry, a drizzle of chocolate sauce, or a sprinkle of cinnamon.
### Popular Ice Cream-Free Milkshake Combinations
The possibilities are endless, but here are a few crowd-pleasing combinations to get you started:
#### Classic Vanilla
* 1-2 frozen bananas
* 1 cup milk (dairy or non-dairy)
* 1 tsp vanilla extract
* 1-2 tbsp maple syrup or honey (optional, adjust to taste)
#### Rich Chocolate Banana
* 1-2 frozen bananas
* 1 cup milk (dairy or non-dairy)
* 2-3 tbsp cocoa powder
* 1 tbsp peanut butter or almond butter
* 1-2 tbsp maple syrup or honey (optional)
#### Strawberry Dream
* 1 frozen banana
* 1 cup frozen strawberries
* 1/2 cup milk (dairy or non-dairy)
* 1/4 cup plain yogurt (dairy or non-dairy)
#### Peanut Butter Cup
* 1 frozen banana
* 1 cup milk (dairy or non-dairy)
* 2 tbsp peanut butter
* 1 tbsp cocoa powder
* 1 date or 1-2 tsp maple syrup (optional)
#### Tropical Mango Delight
* 1 cup frozen mango chunks
* 1/2 frozen banana
* 1 cup coconut milk
* A squeeze of lime juice
### Tips for the Perfect Ice Cream-Free Milkshake
* Use Ripe Bananas: The spottier, the better! Ripe bananas are sweeter and blend into a creamier texture.
* Freeze Fruit Properly: Ensure your fruit is fully frozen for the thickest result. Don’t overcrowd your freezer bags, as this can lead to clumping.
* Invest in a Good Blender: A powerful blender will make a significant difference in achieving a smooth, creamy consistency without chunks. If you’re serious about smoothies and milkshakes, consider checking out a good household blender. A blender food processor combination can also offer great versatility.
* Don’t Over-Blend: Blending for too long can sometimes warm up the mixture and make it less thick. Blend until just smooth.
* Adjust Sweetness Gradually: Start with less sweetener and add more as needed. You can always add more, but you can’t take it away!
* Experiment with Flavors: Don’t be afraid to try new combinations. Add a pinch of cinnamon to your chocolate shake, or a little ginger to your mango shake.
* For a Thicker Shake: Use less liquid, more frozen fruit, or add a tablespoon of chia seeds or a small amount of ice.
* For a Thinner Shake: Add more liquid.
### Troubleshooting Common Issues
Even with the simplest recipes, you might encounter a few hiccups.
* My milkshake is too watery/thin:
* Cause: Not enough frozen ingredients, too much liquid, or the ingredients weren’t fully frozen.
* Solution: Add more frozen fruit (like bananas or berries) or a few ice cubes. If adding ice, be aware it can slightly dilute the flavor. You can also try adding a tablespoon of chia seeds and letting it sit for a few minutes to thicken.
* My milkshake is too thick and won’t blend:
* Cause: Too many frozen ingredients or not enough liquid.
* Solution: Add more liquid, one tablespoon at a time, and blend again. You might need to stop the blender, push down the ingredients with a tamper or spatula, and then resume blending.
* My milkshake has chunks or isn’t smooth:
* Cause: Your blender might not be powerful enough, or the ingredients weren’t blended long enough.
* Solution: If using a less powerful blender, blend for longer, stop and scrape down the sides, and blend again. Ensure your frozen ingredients are in manageable pieces. For particularly stubborn ingredients, try letting them thaw for just 5 minutes before blending.
* The flavor is bland:
* Cause: Not enough flavor enhancers, or the fruits used weren’t very flavorful.
* Solution: Add more of your flavorings like cocoa, vanilla, spices, or a touch more sweetener. Consider using more intensely flavored fruits or a splash of vanilla extract to boost the overall taste.
### Healthy Swaps and Additions
Making milkshakes without ice cream is already a healthier choice, but you can boost the nutritional profile even further.
* Add Greens: A handful of spinach or kale blends in surprisingly well, especially with strong flavors like berries or chocolate, and adds vitamins and minerals.
* Boost Protein: Add a scoop of your favorite protein powder (whey, plant-based) or a tablespoon of hemp seeds.
* Incorporate Healthy Fats: Chia seeds, flax seeds, or a small amount of nut butter contribute healthy fats and fiber.
* Use Dates for Sweetness: Pitted dates are a natural sweetener that also adds fiber and nutrients.
* Opt for Unsweetened Liquids: Choose unsweetened versions of almond, soy, or oat milk to control sugar intake.
### Conclusion
Creating delicious, creamy milkshakes without ice cream is not only possible but also a fantastic way to enjoy a satisfying treat that’s healthier and more customizable. By understanding the role of your creamy base, liquid, and flavor enhancers, and by following a few simple steps, you can whip up a perfect milkshake in minutes. Whether you’re aiming for a classic chocolate flavor, a fruity delight, or something entirely new, your blender is ready to be your best friend in the kitchen. So, gather your ingredients, embrace your creativity, and enjoy the wonderful world of ice cream-free milkshakes!
Key Takeaways
- Achieve creaminess without ice cream: Utilize ingredients like frozen bananas, avocado, or yogurt to replicate the thick texture of traditional milkshakes.
- Master the blender technique: The right blending order and speed are crucial for a smooth consistency and to avoid over-blending.
- Customize with flavor: Explore endless flavor combinations using fruits, cocoa powder, nut butters, spices, and sweeteners to suit your taste.
- Healthier alternatives: This method allows for control over sugar content and can incorporate nutritious ingredients for a guilt-free indulgence.
- Simple and quick preparation: Most recipes take mere minutes to prepare, making it an ideal option for a quick treat or snack.
- Versatile for dietary needs: Easily adapt recipes for vegan, dairy-free, or gluten-free diets by selecting appropriate liquid bases and add-ins.