Step by Step Guide to Deep Clean Your Air Fryer
Keep your air fryer in top condition with this comprehensive deep cleaning guide. Regular cleaning ensures your air fryer cooks food perfectly and lasts longer. We’ll walk you through each step, from unplugging the appliance to polishing the exterior, making the process simple and effective. A clean air fryer means tastier food and a healthier kitchen environment.
Your air fryer has become a kitchen superstar, right? It whips up crispy fries, juicy chicken wings, and perfectly roasted veggies with less oil. But like any hardworking appliance, it needs a good clean now and then. If you’ve noticed a bit of a greasy film, lingering smells, or food residue that just won’t budge, it’s time for a deep clean. This guide will walk you through, step-by-step, to get your air fryer sparkling and ready for its next delicious adventure.
We’ll cover everything from dismantling your air fryer to tackling stubborn grease and ensuring your appliance stays in top working order. A deep clean not only makes your air fryer look better but also ensures your food tastes better and your appliance lasts longer. Let’s get started!
Key Takeaways
- Regular cleaning is crucial: For optimal performance and food taste, aim to deep clean your air fryer at least once a month, or more often with frequent use.
- Safety first: Always ensure your air fryer is unplugged and completely cool before you begin any cleaning process.
- Disassemble what you can: Most air fryer baskets and drawers are removable and dishwasher-safe, making them the easiest parts to clean.
- Tackle stubborn residue with care: For baked-on grease, use a baking soda paste or a dedicated degreaser, but avoid abrasive materials that could damage the non-stick coating.
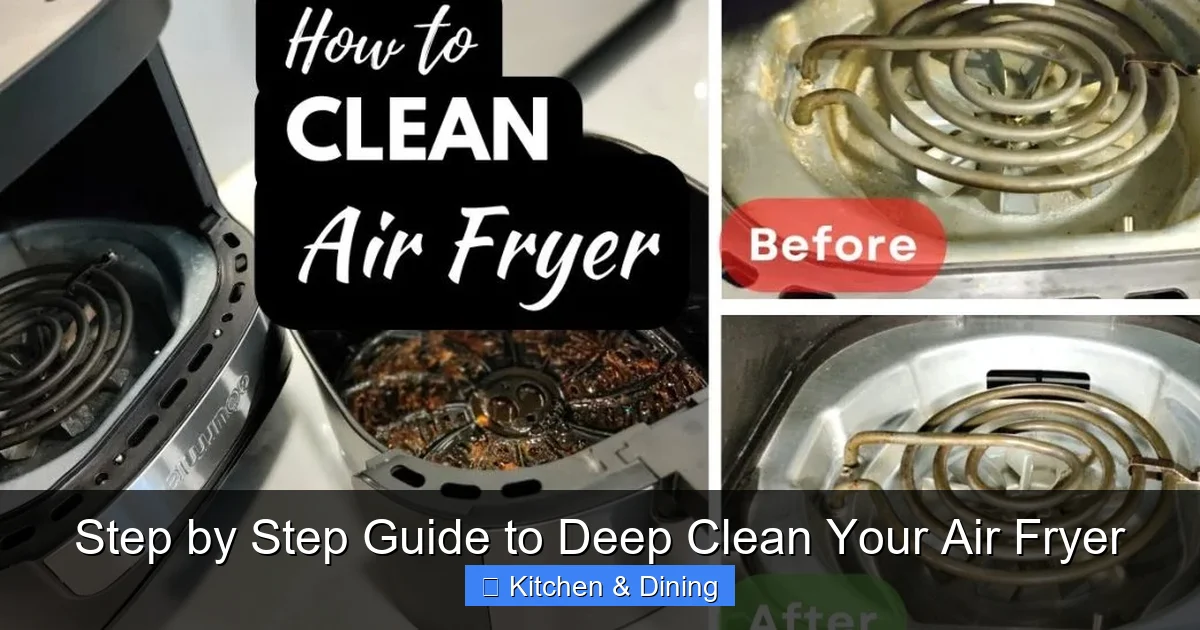
- Don’t forget the heating element: This area often accumulates grease and can cause smoke; gently clean it with a damp cloth or soft brush.
- Wipe down the exterior: Keep the outside of your air fryer looking great by wiping it down with a damp cloth and mild soap.
- Proper drying and reassembly: Ensure all parts are thoroughly dry before reassembling to prevent mold or mildew.
Why Deep Clean Your Air Fryer?
You might be thinking, “I wipe down the basket after every use, isn’t that enough?” While daily wiping is great for minor splatters, a deep clean goes beyond surface-level. Over time, grease, crumbs, and food particles can build up in nooks and crannies, especially around the heating element and inside the main unit. This buildup can lead to:
- Lingering odors: Burnt food particles can make your next meal smell… less than fresh.
- Uneven cooking: A dirty heating element or fan can affect airflow and cooking consistency.
- Smoke: Accumulated grease can smoke up your kitchen, defeating the purpose of a healthier cooking method.
- Reduced lifespan: Persistent grime can degrade parts of the appliance over time.
- Food safety concerns: Old food residue isn’t very appetizing or hygienic.
Just like you wouldn’t want to cook in a dirty oven, your air fryer deserves the same attention. For those who own a versatile appliance like the Instant Pot Vortex Plus 6Qt Clearcook Air Fryer, keeping it clean is key to enjoying all its functions.
Gather Your Cleaning Supplies
Visual guide about Step by Step Guide to Deep Clean Your Air Fryer
Image source: allguiderecipes.info
Before you dive in, make sure you have everything you need. Having your supplies ready will make the process much smoother.
* Dish soap: A mild, everyday dish soap is perfect for most cleaning tasks.
* Baking soda: This is a fantastic natural abrasive and deodorizer.
* White vinegar: Another great natural cleaner and deodorizer, especially for cutting through grease.
* Soft sponges: Non-abrasive sponges are essential to protect your air fryer’s surfaces.
* Microfiber cloths: Great for wiping and polishing without leaving lint.
* Soft-bristled brush or old toothbrush: Perfect for getting into tight spots.
* Paper towels or a clean towel: For drying.
* Optional: Degreaser spray (kitchen-specific): For extremely stubborn grease, but use with caution on non-stick surfaces.
* Optional: Gloves: To protect your hands from grease and cleaning solutions.
Step-by-Step Deep Cleaning Process
Visual guide about Step by Step Guide to Deep Clean Your Air Fryer
Image source: airfryanytime.com
Let’s get your air fryer looking and smelling like new.
Step 1: Safety First – Unplug and Cool Down
Visual guide about Step by Step Guide to Deep Clean Your Air Fryer
Image source: airfryanytime.com
This is the most critical first step. Never attempt to clean an appliance that is plugged in or still hot.
Allow Sufficient Cooling Time
Your air fryer needs to be completely cool to the touch. This can take anywhere from 30 minutes to an hour after use, depending on the model and how long it was running. Touching hot surfaces can lead to burns, and cleaning with residual heat can damage certain materials.
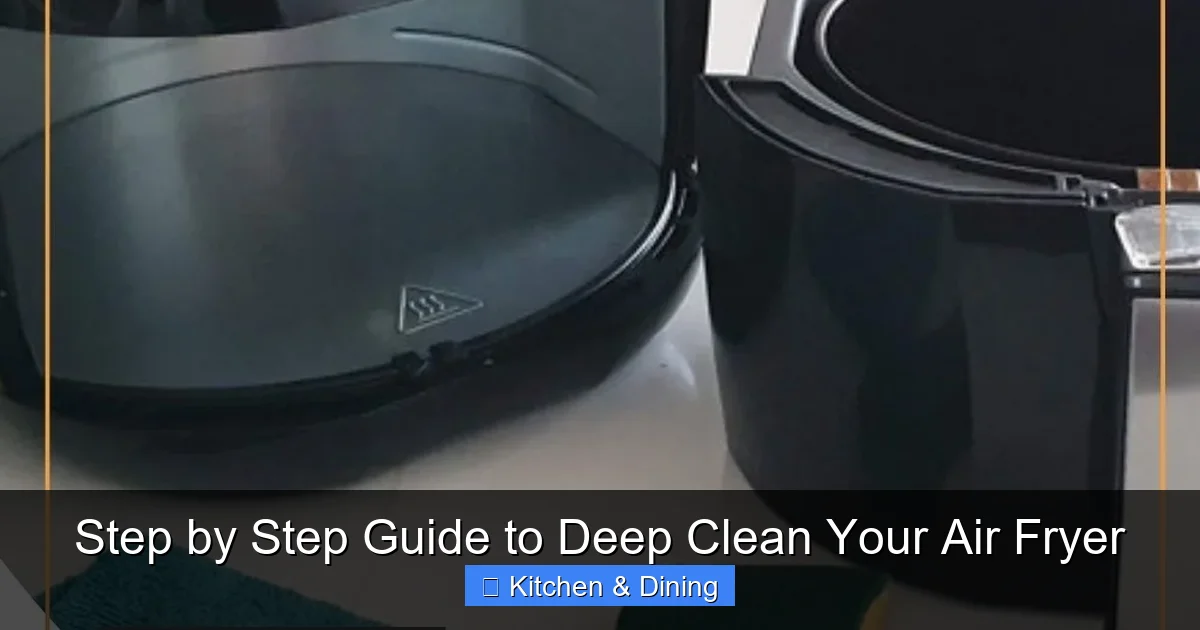
Step 2: Disassemble Removable Parts
Most air fryers are designed with easy-to-remove baskets, racks, and drawers. These are usually the dirtiest parts.
Remove the Basket and Drawer
Carefully pull out the air fryer basket and any accompanying drawers or trays. Check your air fryer’s manual if you’re unsure how to remove these parts properly.
Check if Parts are Dishwasher Safe
Many air fryer baskets and drawers are dishwasher safe. If yours are, this is the easiest way to get them clean. Place them on the top rack of your dishwasher. If you’re washing them by hand, proceed to the next step.
Step 3: Hand Wash Removable Parts
If your parts aren’t dishwasher safe, or you prefer hand washing for a more thorough clean, follow these instructions.
Soak Stubborn Grime
For heavily soiled parts, fill your sink with warm, soapy water. Let the basket and drawer soak for about 10-15 minutes. This will loosen up stuck-on food and grease.
Scrub Away Residue
Use a soft sponge and dish soap to scrub all surfaces. Pay attention to the mesh of the basket and any crevices in the drawer. For tougher spots, you can make a paste of baking soda and water. Apply the paste to the greasy area, let it sit for 10-15 minutes, then scrub gently.
Rinse Thoroughly
Rinse all parts with clean water until all soap residue is gone.
Step 4: Clean the Interior of the Air Fryer
The inside of the main unit is where most of the grease and food particles accumulate.
Wipe Down with a Damp Cloth
Take a microfiber cloth, dampen it with warm water and a drop of dish soap. Wring it out very well so it’s just damp, not dripping. Gently wipe down the inside walls, the bottom, and the top ceiling of the air fryer cavity.
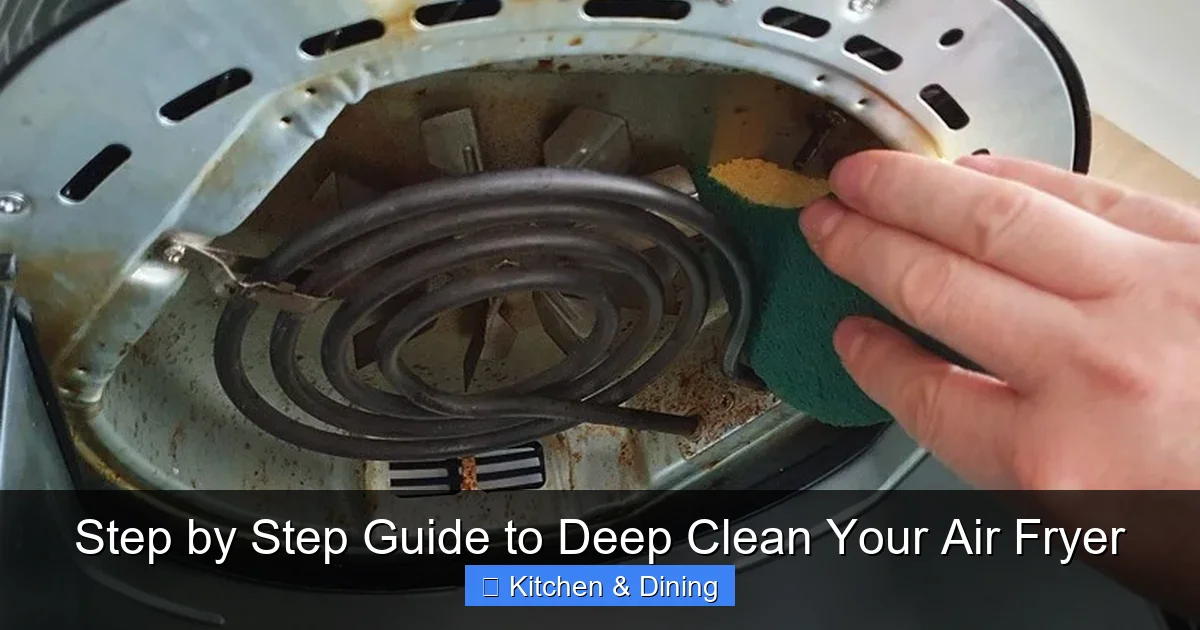
Target the Heating Element
The heating element, usually located at the top, is prone to grease buildup. Use a soft-bristled brush or an old toothbrush dipped in warm, soapy water to gently scrub around the heating element. Be careful not to soak it or bend it. Follow up with a damp cloth to wipe away any loosened debris. This is a crucial step to prevent smoke.
Address Baked-On Grease
If you find stubborn, baked-on grease inside the cavity, a paste of baking soda and water can be your best friend. Apply it to the affected areas, let it sit for 15-20 minutes, then gently scrub with a non-abrasive sponge or cloth. Alternatively, you can use a solution of equal parts white vinegar and water. Spray it onto the interior surfaces (avoiding electrical components), let it sit for a few minutes, then wipe clean.
Rinse and Wipe Again
After cleaning the interior, use a clean, damp cloth to wipe away any remaining cleaning solution or residue. You might need to do this a couple of times to ensure all soap or vinegar is removed.
Step 5: Clean the Exterior of the Air Fryer
Don’t forget the outside! It gets greasy from handling and cooking.
Wipe Down with Mild Soap and Water
Use a damp microfiber cloth with a little dish soap to wipe down the exterior surfaces, including the control panel and handles.
Avoid Harsh Chemicals
Never spray cleaning solutions directly onto the control panel, as moisture can seep in and damage the electronics. Use a slightly damp cloth instead. Also, avoid abrasive cleaners or scouring pads, which can scratch the finish.
Polish and Dry
After cleaning, use a dry microfiber cloth to polish the exterior and ensure it’s streak-free.
Step 6: Dry All Parts Thoroughly
This step is essential to prevent mold, mildew, and electrical issues.
Air Dry or Towel Dry
Let all the removable parts air dry completely on a drying rack or clean towel. You can also dry them with a clean, dry microfiber cloth. Ensure the inside of the air fryer cavity is also completely dry before reassembly. You can leave the door slightly ajar to allow for air circulation if needed.
Step 7: Reassemble and Store
Once everything is clean and bone dry, it’s time to put your air fryer back together.
Put Everything Back
Carefully place the basket, drawer, and any racks back into the air fryer.
Final Check
Give it a quick once-over to make sure everything is seated correctly. Your air fryer is now clean and ready to go!
Tips for Maintaining a Clean Air Fryer
Deep cleaning is important, but regular maintenance makes the job much easier.
- Clean after every use: Wipe down the basket and drawer with a damp cloth and mild soap after each use, once it has cooled. This prevents food from hardening.
- Use liners: Parchment paper liners or reusable silicone mats can catch drips and crumbs, significantly reducing the mess inside. Just ensure they don’t block airflow.
- Shake or flip food: This not only ensures even cooking but also helps prevent excess grease from pooling in one spot.
- Don’t overcrowd the basket: Overcrowding can lead to uneven cooking and more grease splatter.
- Regular Deodorizing: If you notice smells, try placing a few lemon slices or a small bowl of baking soda inside the air fryer overnight.
Troubleshooting Common Air Fryer Cleaning Issues
Sometimes, you encounter a specific problem during cleaning.
Stubborn Greasy Residue
If baking soda paste isn’t enough, try a dedicated kitchen degreaser. Spray it on a cloth, not directly into the air fryer, and wipe the greasy areas. Then, wipe thoroughly with a damp cloth to remove all traces of the degreaser. Always test in an inconspicuous area first.
Lingering Odors That Won’t Go Away
A deep clean should tackle most odors. If a smell persists, try running the air fryer empty with a mixture of water and vinegar (about 1:1 ratio) for 5-10 minutes. Let it cool, then wipe down the interior. You can also try running it with a bowl of baking soda inside for 10-15 minutes. This is similar to how you might clean a microwave oven, as mentioned in our guide on the best way to clean the inside of a microwave oven.
Scratches on Non-Stick Coating
If you accidentally used an abrasive sponge or scrubber, you might have light scratches. While annoying, they usually don’t impede function immediately. Avoid using anything abrasive in the future. For minor damage, continue to clean gently. If the coating is severely damaged, it might be time to consider a new air fryer, perhaps looking at some best multi-function air fryer options.
Conclusion
Deep cleaning your air fryer is an essential part of maintaining its performance and ensuring your food is always delicious and healthy. By following these simple steps, you can banish grease, grime, and lingering odors, keeping your kitchen appliance in tip-top shape. Make it a routine, and your air fryer will reward you with perfectly crispy results for years to come. Happy cooking (and cleaning)!