Never Operate a Blender Without the Jar Securely in Place
Operating a blender without the jar securely attached is a recipe for disaster, leading to messy spills and potential injuries. This guide will walk you through the simple yet crucial steps to ensure your blender jar is properly secured before every use. By following these instructions, you can enjoy safe and efficient blending, avoiding common accidents.
Key Takeaways
- Always check for secure jar placement: Before powering on your blender, confirm the jar is firmly locked onto the base.
- Understand your blender’s locking mechanism: Familiarize yourself with how your specific blender model secures the jar.
- Inspect for damage: Regularly check the jar and the base for any cracks, chips, or worn-out seals that could affect secure fitting.
- Correct assembly prevents accidents: Proper jar placement is the most fundamental safety step to avoid spills and injuries.
- Listen for clicks and feel for stability: Audible clicks and a lack of wobbling are good indicators that the jar is secure.
- Cleanliness is key: Keeping the jar and base clean ensures a smooth, secure fit.
Never Operate a Blender Without the Jar Securely in Place
Welcome to the ultimate guide on blender safety! You’ve probably got a blender in your kitchen, and it’s a fantastic tool for making smoothies, soups, sauces, and so much more. But with great blending power comes great responsibility. One of the most critical safety rules, often overlooked, is to never operate a blender without the jar securely in place. It sounds simple, but the consequences of neglecting this step can be significant, ranging from messy kitchen disasters to potential injuries.
In this comprehensive guide, we’ll break down exactly why this rule is so important, how to ensure your blender jar is always locked and loaded for action, and what to do if you encounter any issues. We’ll cover everything from understanding your blender’s design to practical tips for everyday use. By the end of this article, you’ll have the confidence and knowledge to blend with peace of mind, knowing you’re prioritizing safety every time. So, let’s dive in and make your blending experience as safe as it is delicious!
Why Jar Security is Paramount
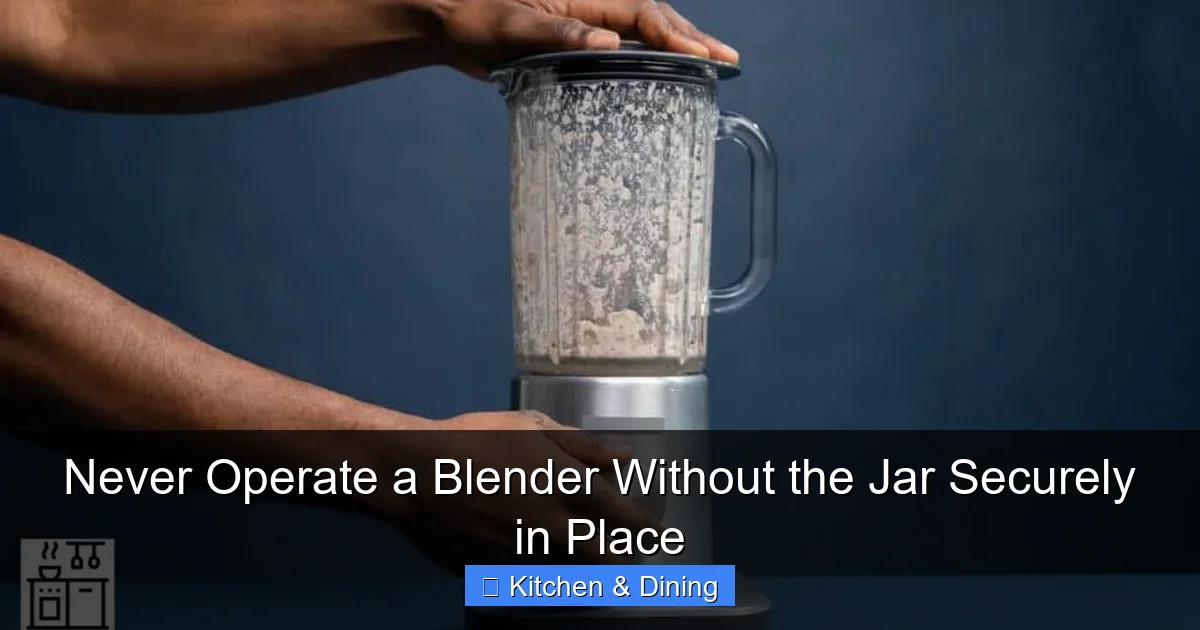
Visual guide about Never Operate a Blender Without the Jar Securely in Place
Image source: kitchencuddle.com
Before we get into the “how,” let’s talk about the “why.” Why is it so incredibly important to make sure that blender jar is locked down tight? It all boils down to a few key reasons:
Preventing Messy Explosions
Imagine this: you’re mid-blend, making your morning smoothie, and suddenly, the jar pops off the base. What happens next is a chaotic, high-speed explosion of fruits, vegetables, yogurt, and liquid. Your kitchen walls, ceiling, and countertops become a Jackson Pollock painting of your breakfast. This isn’t just a clean-up nightmare; it’s a sticky, unsanitary mess that can take hours to fully address. Ensuring the jar is secure prevents this messy outcome entirely.
Avoiding Serious Injuries
Blenders operate at high speeds with powerful blades. If the jar becomes dislodged while in operation, the spinning blades are exposed. This poses a serious risk of cuts and lacerations to anyone nearby. Even a minor slip can lead to significant injury. A securely locked jar keeps those dangerous blades contained where they belong, protecting you and your loved ones.
Protecting Your Appliance
A blender jar that isn’t properly secured can also damage your appliance. The jarring motion and potential impact of a falling jar can break the base, crack the jar itself, or damage the motor. Replacing a blender can be expensive, and preventing this damage is much easier and cheaper than repairing or replacing the unit.
Maintaining Blending Efficiency
When the jar is not securely in place, the blender can vibrate excessively. This vibration can lead to inefficient blending, where ingredients aren’t properly mixed or pureed. A secure jar ensures a stable platform for optimal blending performance.
Understanding Your Blender’s Locking Mechanism
Visual guide about Never Operate a Blender Without the Jar Securely in Place
Image source: blenderartists.org
Every blender is a little different, but most modern blenders have a system designed to ensure the jar locks securely onto the base. Taking a moment to understand this mechanism for your specific model is the first step to safe operation.
Common Locking Systems
* Twist-and-Lock: Many blenders feature a jar that you place onto the base and then twist clockwise until you hear or feel a distinct “click.” This often engages tabs on the jar with slots on the base.
* Alignment Tabs: Some blenders rely on specific alignment tabs on the bottom of the jar that must fit into corresponding grooves on the base before you can twist or push to lock.
* Screw-On Base: Certain high-powered blenders may have a jar where the blade assembly screws onto the bottom, and then the entire unit screws or locks onto the base.
Consult Your Manual
The absolute best way to understand your blender’s locking mechanism is to consult the user manual that came with your appliance. If you’ve misplaced it, a quick search online for your blender’s make and model should bring up a digital copy. The manual will clearly illustrate how the jar is meant to attach and secure.
Step-by-Step: Ensuring Your Blender Jar is Secure

Visual guide about Never Operate a Blender Without the Jar Securely in Place
Image source: imgv2-2-f.scribdassets.com
Now that you understand the importance and how your blender works, let’s walk through the process of ensuring your blender jar is safely in place, every single time.
Step 1: Place the Blender Base on a Stable Surface
Before you even pick up the jar, make sure the blender base is on a flat, stable, and dry surface. A wobbly counter or a wet surface can make it difficult to properly seat and lock the jar. Ensure there’s enough clearance around the blender, so you don’t knock anything over during operation.
Step 2: Align the Jar with the Base
Carefully lift the blender jar. Look at the bottom of the jar and the top of the blender base. You’ll notice specific shapes, tabs, or indicators that show you how the jar is meant to align. Gently lower the jar onto the base, making sure these alignment points match up. Don’t force it. If it doesn’t seem to fit naturally, lift it up and try again. Misalignment is a common reason why a jar might not secure properly.
Step 3: Secure the Jar
This is the crucial step. Depending on your blender model, this might involve:
* Twisting: Once aligned, gently twist the jar clockwise (usually) until you feel or hear a positive click. This click indicates that the locking mechanism has engaged.
* Pushing Down: Some blenders might require a firm downward push after alignment to engage a locking lever or mechanism.
* Tightening a Ring: If your blender has a separate locking ring at the base of the jar, ensure this is screwed on securely.
Step 4: Test for Stability
After you believe the jar is locked, give it a gentle wiggle. It should feel firmly attached to the base with absolutely no wobbling or looseness. If it moves, shifts, or feels loose in any way, do NOT proceed. Remove the jar and re-seat it, following Steps 2 and 3 again. A secure jar will feel like it’s part of the base, not a separate piece.
Step 5: Add Ingredients (Optional, but good practice)
While many people add ingredients before securing the jar, some prefer to ensure the jar is locked first, then add ingredients. This is a matter of personal preference, but it reinforces the habit of checking the lock before proceeding.
Step 6: Attach the Lid Securely
The lid is the final piece of the safety puzzle. Ensure the lid is firmly in place, with all tabs or seals engaged. Many lids have a small opening or cap; make sure this is also closed or has its cap securely fastened. A lid that isn’t properly secured can also lead to spills, though typically not as catastrophic as a jar coming loose.
Practical Tips for Safe Blending
Beyond the core steps of securing the jar, here are some additional tips to enhance your blender safety and experience:
Regularly Inspect Your Blender
* Check the Jar: Look for any cracks, chips, or deep scratches, especially around the rim and the base. These can compromise the seal and the jar’s structural integrity.
* Examine the Base Unit: Ensure the motor base is clean and free from debris, especially around the connection point where the jar attaches.
* Inspect the Gasket/Seal: If your jar has a removable rubber gasket or seal, check it for wear and tear. A damaged seal can prevent a secure fit and cause leaks.
Don’t Overfill the Blender
Overfilling can put extra strain on the motor and the locking mechanism. It also increases the risk of leaks if the lid isn’t perfectly sealed. Most blenders have a “max fill” line; respect it.
Start on a Low Speed
When you first turn on your blender, start with the lowest speed setting. This allows the ingredients to begin moving and the motor to engage gradually. Then, you can increase the speed as needed. This also gives you a moment to listen for any unusual noises or vibrations that might indicate a problem.
Never Leave a Running Blender Unattended
Even with the jar securely in place, it’s best practice to stay near your blender while it’s running. This allows you to quickly turn it off if you notice anything amiss.
Clean Your Blender Properly
After each use, thoroughly clean your blender jar, lid, and base. Food particles or sticky residues can interfere with the proper seating and locking of the jar. Many blender jars are dishwasher safe, but always check your manual. For the base, a damp cloth is usually sufficient. When cleaning the blade area, always do so with extreme caution. If you’re looking for the best way to clean the inside of a microwave oven, the principles of careful handling and proper cleaning agents apply to all kitchen appliances.
Consider Blender Type
If you’re in the market for a new blender, consider features that enhance safety and security. Some high-end models have integrated safety features that prevent the blender from starting if the jar isn’t locked. If you often make large batches or need a workhorse for tough jobs, looking into the best household blender or even a best blender food processor combination might offer sturdier construction and more robust locking mechanisms.
Troubleshooting Common Jar Security Issues
Sometimes, despite your best efforts, you might encounter a problem. Here are a few common issues and how to address them:
The Jar Won’t Twist or Lock
* Misalignment: Lift the jar and try re-aligning it carefully with the base. Ensure no ingredients are caught between the jar and the base that could prevent it from seating correctly.
* Debris: Check the connection points on both the jar and the base for any dried-on food particles or sticky residue. Clean them thoroughly and try again.
* Worn-Out Mechanism: If your blender is older, the locking mechanism might be worn. In this case, the blender may need to be replaced.
The Jar Feels Loose After Locking
* Improper Twist: You might not have twisted it far enough to fully engage the locking mechanism. Try twisting it again, ensuring you hear or feel the distinct “click.”
* **Damaged Parts:** Inspect the locking tabs on the jar and the corresponding slots on the base. If any are bent, cracked, or missing, the jar will not lock securely. This is a sign that the blender may be unsafe to use.
* Gasket Issue: A damaged or improperly seated gasket at the bottom of the jar can prevent a tight seal and a secure fit.
The Blender Leaks While Running
* Loose Lid: Ensure the lid is fully secured.
* Overfilled: You may have overfilled the jar. Empty some ingredients.
* **Damaged Jar or Seal:** This is a more serious issue. If the jar itself is cracked or the seal is worn out, it needs to be replaced or the blender unit may need to be retired.
Conclusion
The simple act of ensuring your blender jar is securely in place before operation is a cornerstone of kitchen safety. It’s a habit that takes mere seconds but can save you from significant messes, costly damage, and potentially serious injuries. Always take the time to align, twist, and confirm that your blender jar is locked firmly onto the base. Regularly inspect your appliance for wear and tear, and when in doubt, err on the side of caution. By following these guidelines, you can confidently use your blender to create delicious and healthy recipes, enjoying its convenience without the risk. Happy blending!