How to Grind Masala at Home Using a Mixer Grinder
Unlock the vibrant flavors of freshly ground spices by using your mixer grinder! This guide provides a comprehensive walkthrough on how to grind masala at home, ensuring richer aromas and superior taste in your cooking. We cover preparation, grinding techniques, and cleaning, making it simple to achieve perfect spice blends every time.
Key Takeaways
- Proper Preparation is Crucial: Always dry your spices thoroughly before grinding to prevent clumping and ensure a fine powder.
- Use the Right Mixer Grinder Jar: The small chutney jar is ideal for grinding spices due to its power and efficiency.
- Grind in Short Bursts: Pulses or short bursts of grinding prevent the motor from overheating and allow for better control over the spice texture.
- Don’t Overfill the Jar: Leave enough space for spices to move freely, ensuring even grinding and preventing strain on the motor.
- Clean Immediately: Cleaning the mixer grinder jar right after use prevents spice odors and colors from lingering.
- Store Properly: Airtight containers are essential for keeping your freshly ground masala potent and flavorful.
How to Grind Masala at Home Using a Mixer Grinder
Are you tired of store-bought spices losing their punch? Do you crave the intense aroma and authentic taste that only freshly ground spices can deliver? The good news is, you don’t need a fancy spice grinder to achieve this. Your trusty mixer grinder, a staple in almost every Indian kitchen, can do the job beautifully!
Grinding your own masala at home using a mixer grinder is a rewarding experience. It allows you to control the coarseness, freshness, and even the combination of spices in your blends. This guide will walk you through the entire process, from selecting your spices to cleaning your grinder, ensuring you get the best results every time. Get ready to elevate your cooking with the power of freshly ground spices!
Why Grind Your Own Masala?
Before we dive into the ‘how-to’, let’s briefly touch upon the ‘why’. The difference in flavor and aroma between pre-ground spices and those you grind yourself is remarkable.
* **Freshness and Flavor:** Spices begin to lose their volatile oils, the very source of their flavor and aroma, as soon as they are ground. Grinding at home means you are using them at their peak potency.
* **Purity:** You know exactly what goes into your masala. There are no added fillers, anti-caking agents, or artificial colors often found in commercial spice powders.
* **Customization:** Want a spicier garam masala or a milder coriander-cumin blend? You can tailor your spice mixes precisely to your liking.
* **Cost-Effective:** In the long run, buying whole spices and grinding them yourself can often be more economical.
Now, let’s get to the practical steps of grinding masala using your mixer grinder.
Step 1: Selecting and Preparing Your Spices

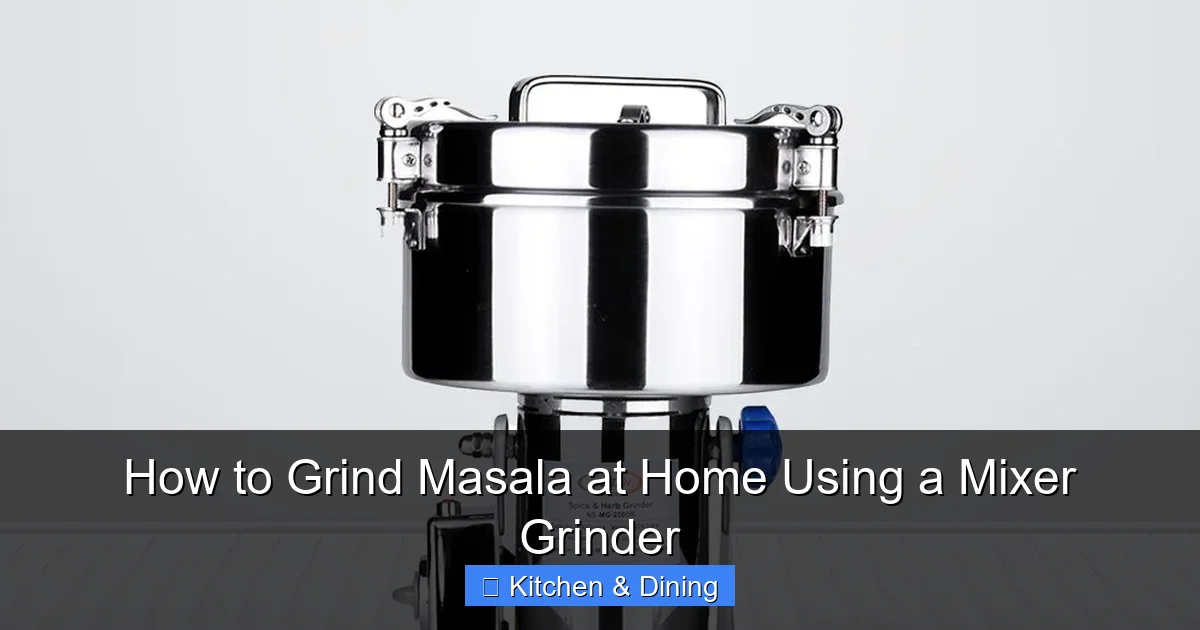
Visual guide about How to Grind Masala at Home Using a Mixer Grinder
Image source: pngall.com
The foundation of great masala is high-quality whole spices.
Choosing Your Whole Spices
When selecting whole spices, look for:
* **Aroma:** They should have a strong, pleasant smell.
* **Appearance:** Whole spices should look fresh, not dull or dusty.
* **Quality:** Opt for reputable brands or source from a trusted local store.
Common whole spices used in Indian cooking include:
* Coriander seeds (Dhania)
* Cumin seeds (Jeera)
* Black peppercorns (Kali Mirch)
* Cloves (Laung)
* Cardamom pods (Elaichi – green and black)
* Cinnamon sticks (Dalchini)
* Bay leaves (Tej Patta)
* Fenugreek seeds (Methi Dana)
* Mustard seeds (Rai)
Drying Your Spices
This is a critical step for achieving a fine powder and preventing your mixer grinder from getting clogged. Moisture can cause spices to clump together, making them difficult to grind and potentially damaging the grinder’s blades or motor.
* **Sun Drying:** The traditional and most effective method. Spread your spices on a clean cloth or tray and leave them in direct sunlight for a few hours or even a day or two, depending on the spice and humidity. Stir them occasionally.
* **Oven Drying:** If sun drying isn’t feasible, you can gently dry them in an oven. Preheat your oven to its lowest setting (around 50-70°C or 120-150°F). Spread the spices on a baking sheet lined with parchment paper and dry for 30-60 minutes, or until completely dry. Keep a close eye on them to prevent burning.
* **Pan Roasting (Caution):** Some spices, like coriander and cumin seeds, can be lightly dry roasted on a low heat in a pan until fragrant. This enhances their flavor but also makes them brittle and easier to grind. However, be extremely careful not to burn them, as this will make your masala bitter. This method is more for enhancing flavor than solely for drying. Ensure they cool completely before grinding.
Test for Dryness: A simple test is to try breaking a spice in half. If it snaps cleanly and easily, it’s dry enough. If it bends or feels pliable, it needs more drying time.
Step 2: Understanding Your Mixer Grinder
Not all mixer grinders are created equal, but most modern ones are well-suited for grinding spices.
Choosing the Right Jar
Most mixer grinders come with multiple jars of different sizes. For grinding spices, the small chutney jar is usually the best choice.
* **Why the Chutney Jar?** These jars are typically smaller, more robust, and designed for grinding tougher ingredients into a fine paste or powder. Their compact size concentrates the power of the motor effectively, leading to finer grinding. The blades in these jars are often sharper and more durable.
* Avoid Large Jars: While you might be tempted to use a larger jar for convenience, it’s less efficient for small quantities of spices. The spices won’t be concentrated enough for the blades to grind them effectively, potentially leading to uneven grinding or requiring longer run times, which can overheat the motor.
Familiarize Yourself with the Settings
Your mixer grinder likely has different speed settings and a pulse function.
* **Pulse Function:** This is your best friend when grinding spices. It allows you to grind in short, controlled bursts, giving you more command over the texture and preventing the motor from overheating.
* **Speed Settings:** Start with a lower speed to break down the larger pieces and then increase the speed for a finer grind.
Step 3: The Grinding Process
Now for the main event! This is where you transform your whole spices into aromatic powders.
Loading the Jar
* Don’t Overfill: This is a cardinal rule. Overfilling the jar is the most common mistake people make. The spices need space to tumble and come into contact with the blades. A good rule of thumb is to fill the jar no more than one-third to half full.
* Add Spices: Place your dried whole spices into the chutney jar. If you are making a specific blend, add all the ingredients for that blend together.
Grinding Technique
* Start with the Pulse: Begin by using the pulse function for a few seconds. This helps to break down the spices and get them moving.
* **Short Bursts:** Switch to a continuous speed setting. Grind for about 15-30 seconds at a time.
* Shake and Repeat: After each grinding burst, stop the mixer. Remove the jar (or carefully tilt it if the lid is secure) and give it a gentle shake. This redistributes the spices, ensuring that any larger pieces that might be stuck to the sides or bottom are brought back down towards the blades.
* Check Consistency: Open the lid carefully (ensure the motor has completely stopped) and check the consistency. You can use a spoon to feel the texture.
* **Continue Grinding:** Repeat the process of grinding in short bursts, shaking, and checking until you achieve the desired fineness. This might take several repetitions, especially for tougher spices like peppercorns.
* Motor Overheating:** If you notice the mixer grinder becoming hot to the touch or smelling hot, stop immediately and let it cool down for at least 10-15 minutes. Grinding spices can be tough on the motor, so giving it breaks is crucial.
Achieving Desired Texture
* **Fine Powder:** For a fine powder, you might need to grind for longer, in more repetitions, and ensure your spices were very dry. You can even sift the powder through a fine-mesh sieve to remove any larger particles.
* **Coarse Grind:** For a coarser masala, grind for shorter durations and check the texture frequently. You might only need a few pulses or short bursts. This is great for spice rubs or marinades where you want some texture.
Step 4: Straining and Storing Your Masala
Once you’ve achieved the perfect grind, it’s time to store your flavorful creation.
Sifting (Optional)
If you desire a super-fine powder, especially for delicate dishes or spice blends where uniformity is key, you can sift your ground masala.
* **Use a Fine-Mesh Sieve:** Place a fine-mesh sieve over a clean bowl or container.
* **Sift:** Pour the ground spices into the sieve and gently tap the side or use a spoon to push the powder through.
* **Re-grind Larger Particles:** Any larger particles that remain in the sieve can be put back into the mixer grinder jar for another short grinding session, or you can keep them separate for a coarser grind option.
Cooling Down
Before transferring your freshly ground masala to its storage container, let it cool down completely. Hot spices can release moisture and steam, which can lead to clumping or spoilage.
Proper Storage
This is as important as the grinding process itself! Improper storage will quickly diminish the potency and freshness of your homemade masala.
* **Airtight Containers:** Invest in good quality, airtight containers. Glass jars with tight-fitting lids or metal tins are excellent choices. Plastic containers can sometimes retain odors.
* **Keep it Dry:** Ensure the container is completely dry before adding the masala.
* **Cool, Dark Place:** Store your spice containers in a cool, dark place, away from direct sunlight, heat sources (like the stove or oven), and humidity. The pantry or a dedicated spice cabinet is ideal.
* **Labeling:** Label your containers with the name of the spice blend and the date it was ground. This helps you keep track of freshness.
Step 5: Cleaning Your Mixer Grinder
Prompt and proper cleaning is essential to maintain your mixer grinder and prevent flavor contamination.
Immediate Cleaning is Key
The best time to clean the mixer grinder jar is immediately after you’ve finished grinding and transferred your masala. This prevents the spices from sticking and becoming difficult to remove.
Cleaning the Jar
* **Rinse with Warm Water:** Immediately after emptying the jar, rinse it thoroughly with warm water.
* **Washing with Soap:** Add a drop of mild dish soap and a little warm water to the jar. Secure the lid and run the mixer for a few seconds. This will create a soapy lather that helps lift residual spice particles.
* **Scrubbing (If Needed):** If there are stubborn bits of spice, use a bottle brush or a soft sponge to gently scrub the inside of the jar, paying attention to the corners and under the blades.
* **Rinse Thoroughly:** Rinse the jar completely with clean water until all soap residue is gone.
Cleaning the Blades and Lid
* **Blades:** The blades themselves are usually cleaned by the soapy water method. Be very careful when handling them, as they are sharp.
* **Lid and Gasket:** Wash the lid and any rubber gasket with soap and water. Ensure the gasket is clean and free of any spice particles.
Drying
* **Air Dry:** After washing, turn the jar upside down and let it air dry completely. You can also dry it with a clean, lint-free cloth. Ensure the inside is bone dry before storing it.
* **Removing Odors:** If a strong aroma lingers, you can try grinding a small handful of uncooked rice in the jar for a minute, then wash it again. Another effective method is to put a tablespoon of baking soda in the jar with some water and let it sit for a few hours or overnight before washing.
Practical Tips for Grinding Masala
* Batch Grinding: If you plan to use a lot of a particular spice blend, grind a larger batch. Freshly ground spices are best used within a few months.
* Spice Combinations: Don’t be afraid to experiment with your own spice blends. A simple ratio of coriander seeds and cumin seeds makes a versatile base.
* Tough Spices: For very hard spices like peppercorns or whole dried chilies, you might need to grind them separately first, or combine them with slightly softer spices to help break them down.
* Pre-Grinding:** Some people like to pre-break larger spices (like cinnamon sticks) into smaller pieces by hand before putting them in the grinder. This can make the grinding process easier on the motor.
* Cleanliness is Paramount:** Always ensure the mixer grinder jar is impeccably clean and dry before grinding anything else. This prevents cross-contamination of flavors. For example, you don’t want your garam masala to taste faintly of turmeric from a previous grind.
Troubleshooting Common Issues
* **Spices Not Grinding Finely:**
* **Reason:** Spices might not be dry enough, or you’re overfilling the jar.
* **Solution:** Ensure spices are bone dry. Try grinding in smaller batches. Give the jar a good shake between pulses.
* **Mixer Grinder Overheating:**
* **Reason:** Grinding for too long without breaks, or overfilling the jar.
* **Solution:** Always grind in short bursts. Let the motor cool down completely between grinding sessions. Ensure the jar is not overfilled.
* **Lingering Odors/Colors:**
* **Reason:** Incomplete cleaning, or porous jar material.
* **Solution:** Clean immediately after use with soap and water. Use the baking soda or uncooked rice method to deodorize. Stainless steel jars are generally better at preventing odor retention than plastic ones.
Conclusion
Grinding your own masala at home using a mixer grinder is a simple yet incredibly impactful way to enhance your cooking. It unlocks a world of fresh aromas and vibrant flavors that pre-ground spices simply can’t match. By following these steps, paying attention to preparation, using the right techniques, and cleaning your appliance properly, you’ll be well on your way to creating your own signature spice blends. So, dust off your mixer grinder, gather your whole spices, and embark on a delicious culinary journey! Your taste buds will thank you.