Ensure the Blender Base Is Free from Food or Debris Buildup
Keeping your blender base clean is crucial for its longevity and your kitchen’s hygiene. Food or debris buildup can lead to motor issues, unpleasant odors, and even attract pests. This guide will walk you through the simple steps to ensure the blender base is free from food or debris buildup, ensuring your appliance works efficiently and safely. Regular cleaning prevents common problems and keeps your kitchen a healthier place.
Ensure the Blender Base Is Free from Food or Debris Buildup
Welcome to your ultimate guide on keeping your blender base pristine! We all love the convenience of a blender for whipping up smoothies, soups, sauces, and more. But what happens after the delicious creations are made? Often, the focus is on cleaning the pitcher, blades, and lid, leaving the blender base itself neglected. This oversight can lead to a buildup of food particles, sticky residues, and even dust, which can cause problems ranging from unpleasant odors to compromised motor function.
This guide is designed to empower you with the knowledge and practical steps to effectively clean your blender base, ensuring it remains hygienic, functional, and lasts for years to come. You’ll learn why this seemingly small task is so important, how to tackle common cleaning challenges, and how to make blender base cleaning a simple part of your kitchen routine. By the end of this guide, you’ll be confident in your ability to ensure the blender base is free from food or debris buildup.
Key Takeaways
- Regular Wipe-Downs Prevent Major Buildup: A quick wipe after each use is the easiest way to keep your blender base clean and prevent sticky messes from hardening.
- Unplug for Safety: Always unplug the blender before attempting any cleaning to avoid accidental activation and potential injury.
- Targeted Cleaning for Stains: For stubborn stains or sticky residue, a damp cloth with a mild soap or a paste of baking soda and water can be very effective.
- Ventilation is Key: Ensure the motor vents are clear of any obstructions to allow for proper airflow and prevent overheating.
- Inspect for Damage: While cleaning, take a moment to inspect the base for any cracks or loose parts that might affect performance or safety.
- Address Odors Promptly: Persistent odors can often be neutralized with a vinegar and water solution, run briefly in a clean jar.
Why Cleaning the Blender Base Matters
It might seem like the blender base is somewhat protected from direct food contact, but that’s not entirely true. Splatters, drips, and condensation can all find their way to the base, especially around the area where the pitcher connects. If left unaddressed, this can lead to several issues:
- Hygiene Concerns: Food residue can become a breeding ground for bacteria and mold, which is not only unhygienic but can also lead to unpleasant odors.
- Mechanical Problems: Small food particles can get into vents or crevices, potentially hindering the motor’s ability to cool itself. This can lead to overheating and a shortened lifespan for your appliance.
- Attracting Pests: Sweet or sticky residue can attract ants, fruit flies, and other unwelcome kitchen visitors.
- Aesthetic Appeal: A clean kitchen appliance simply looks better and contributes to a more pleasant cooking environment.
- Preventing Stains: Dried-on food can lead to permanent stains on the plastic or metal surfaces of your blender base.
Regular cleaning, even a quick wipe-down, is far easier than dealing with a deeply ingrained mess. Think of it like keeping your kitchen counters clean – consistent effort prevents a major cleaning overhaul later. For those who frequently use their blenders, especially for things like making purees for babies, a clean base is even more critical for health and safety. If you’re looking for the best tools for such tasks, exploring options for a best baby food processor or a best food processor for baby food can also highlight the importance of appliance cleanliness.
Step-by-Step Guide to Cleaning Your Blender Base
Cleaning your blender base doesn’t have to be a chore. With the right approach, it’s a quick and effective process.
Step 1: Safety First – Unplug Your Blender
This is the most crucial step and should never be skipped. Before you do anything else, ensure your blender is unplugged from the power outlet. This prevents accidental activation, which could lead to serious injury if your hands are near any moving parts or if the blender were to suddenly start.
Step 2: Disassemble If Possible (and Necessary)
Most blender bases are designed to be relatively simple. The main part to consider is the connection point where the blender jar attaches. Sometimes, food particles can get trapped in the grooves or around the coupling mechanism.
Checking the Coupling Mechanism
The coupling mechanism is usually a plastic or metal piece on the base that engages with the blade assembly in the jar. While you generally shouldn’t try to force this off, a quick inspection is worthwhile. If you see any visible debris clinging to it, a dry brush or a slightly damp cloth can often dislodge it.
Step 3: Gentle Wiping of the Exterior
The exterior of your blender base is usually made of plastic or sometimes stainless steel.
Using a Damp Cloth
The best tool for routine cleaning is a soft, damp cloth.
- Dip a clean cloth in warm water. Wring it out thoroughly so it’s just damp, not dripping wet.
- Gently wipe down the sides, front, and top of the blender base.
- Pay special attention to any areas where splatters might have occurred, especially around the control panel or buttons.
Dealing with Sticky Residue
If you encounter dried-on, sticky residue, a little mild dish soap can help.
- Add a drop or two of mild dish soap to your damp cloth.
- Gently scrub the affected area.
- Wipe the area again with a clean, damp cloth to remove any soap residue.
- Dry the area with a separate, dry cloth.
Step 4: Cleaning the Control Panel and Buttons
The control panel, whether it’s physical buttons or a touch-sensitive surface, can accumulate grime.
Careful Cleaning
It’s important to be gentle here to avoid damaging the electronics.
- Use your slightly damp cloth for the control panel.
- Avoid spraying cleaner directly onto the panel. Instead, apply a small amount of cleaner to your cloth.
- For very stubborn grime around buttons, you might use a cotton swab dipped in a mild cleaning solution (like diluted vinegar or soapy water) and carefully run it along the edges of the buttons. Ensure the swab is not too wet.
Step 5: Addressing Vents and Crevices
Blenders have vents to help dissipate heat from the motor. These can get clogged with dust and debris.
Clearing the Airflow
Proper ventilation is essential for your blender’s motor.
- Use a dry, soft-bristled brush (like a clean paintbrush or a soft toothbrush) to gently brush away any dust or debris from the vents.
- For tougher clogs, you can use a can of compressed air to blow out the dust. Hold the can upright and use short bursts.
- Be careful not to push debris further into the vents.
Step 6: Drying Thoroughly
After cleaning, it’s important to ensure the blender base is completely dry before plugging it back in or storing it.
- Use a clean, dry cloth to wipe down all surfaces.
- Allow the base to air dry for a few extra minutes if necessary, especially around the vents.
Tackling Stubborn Stains and Odors
Sometimes, despite our best efforts, stains and odors can persist. Here are some effective solutions.
Stubborn Stains
For those persistent, dried-on food stains that soap and water won’t budge, a paste of baking soda and water can be incredibly effective.
Baking Soda Paste Method
- Mix about 2 tablespoons of baking soda with just enough water to form a thick paste.
- Apply the paste directly to the stain.
- Let it sit for 10-15 minutes.
- Gently scrub the area with a soft cloth or sponge.
- Wipe clean with a damp cloth and dry thoroughly.
Baking soda is a mild abrasive and a natural deodorizer, making it perfect for tackling tough kitchen messes.
Lingering Odors
If your blender base has developed an unpleasant odor, it’s likely due to old food particles trapped in crevices or vents.
Vinegar and Water Method
A simple solution of white vinegar and water can help neutralize odors.
- Mix equal parts white vinegar and water in a small bowl.
- Dip a cloth into the solution, wring it out well, and wipe down the blender base, paying attention to any areas where food might have splattered.
- For deeper odor issues, you can place the blender jar (empty and clean) back on the base, and then run the vinegar-water solution in the jar for a few seconds to let the fumes circulate around the base area.
- Discard the vinegar-water solution from the jar and rinse thoroughly.
- Wipe down the exterior of the base with a clean, damp cloth and dry completely.
The acidity of the vinegar helps to break down and neutralize odor-causing compounds.
Tips for Maintaining a Clean Blender Base
Preventing buildup is always easier than cleaning it. Incorporate these simple habits into your routine:
- Wipe Down Immediately: The best time to clean your blender base is right after you’ve finished using it. A quick wipe with a damp cloth before any spills dry will save you a lot of effort later.
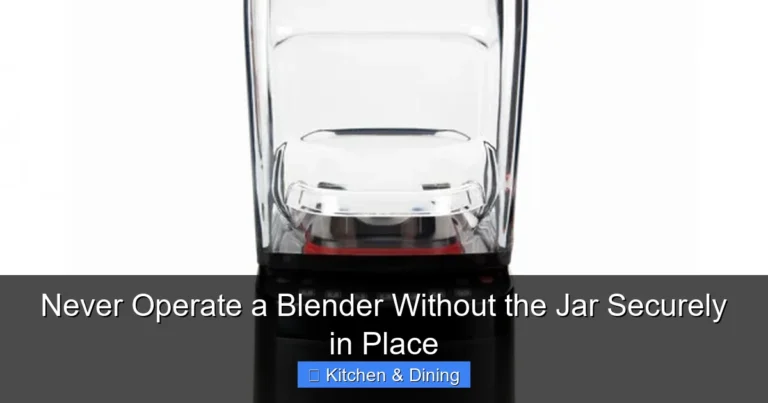
- Use a Lid: Always ensure the blender jar lid is securely in place during operation. This significantly reduces the chance of splatters reaching the base.
- Be Careful When Pouring: When transferring contents from the blender jar, be mindful of drips. You can even keep a cloth handy to catch any stray drops.
- Regular Deep Cleans: Even with daily wipe-downs, aim for a more thorough cleaning of the base (checking vents, etc.) at least once a month, or more often if you use your blender frequently.
- Inspect for Damage: During your cleaning routine, take a moment to look for any cracks, loose parts, or signs of wear on the blender base and its cord. Early detection can prevent bigger issues. If you’re considering upgrading, our guides on the best household blender or best blenders for pureeing food might offer some insights.
Troubleshooting Common Blender Base Issues
Even with diligent cleaning, you might encounter specific problems.
My blender base smells funny even after cleaning.
This often means there’s residue trapped deep within the motor vents or around the coupling mechanism. Try the baking soda paste for any visible residue and the vinegar and water method for odor neutralization. If the smell persists, it might indicate an internal motor issue, and it might be time to consult the manufacturer’s manual or consider a replacement.

Visual guide about Ensure the Blender Base Is Free from Food or Debris Buildup
Image source: thumbs.dreamstime.com
There’s a sticky residue I can’t remove from the control panel.
Be patient! For tough spots on the control panel, try using a cotton swab dipped in a solution of warm water and a tiny amount of mild dish soap. Gently work the swab around the edges of buttons. You can also try a paste of baking soda, but be very careful not to let excess moisture seep into the electronic components. Always dry thoroughly.
I see some rust on the metal parts of the base.
This is less common, especially on newer models, but can occur if moisture is trapped. For light rust, you can try a paste of lemon juice and salt, let it sit for a bit, then gently scrub and wipe clean. Ensure the area is completely dry afterward. If rust is extensive, it might affect the appliance’s integrity.
Conclusion
Ensuring the blender base is free from food or debris buildup is a simple yet vital part of maintaining your kitchen appliances. It’s not just about aesthetics; it’s about hygiene, longevity, and optimal performance. By incorporating regular, quick wipe-downs into your routine, addressing splatters immediately, and performing occasional deeper cleans of the vents and crevices, you can prevent common issues like odors, mechanical problems, and stubborn stains. Remember always to prioritize safety by unplugging your blender before cleaning.
A clean blender base contributes to a healthier kitchen environment and ensures your appliance is ready for its next task, whether it’s creating a morning smoothie or a savory sauce. So, take a few extra moments after each use to give your blender base a little attention – your appliance, and your taste buds, will thank you for it!